I found this idea on the net last year. I thought it was such a cute story, and I had dozens of ideas for sparkly spiders. I decided to make it this years Christmas craft. (I do something every year for co-workers and friends).
There are two basic parts to this project. The spiders, and the presentation cards.
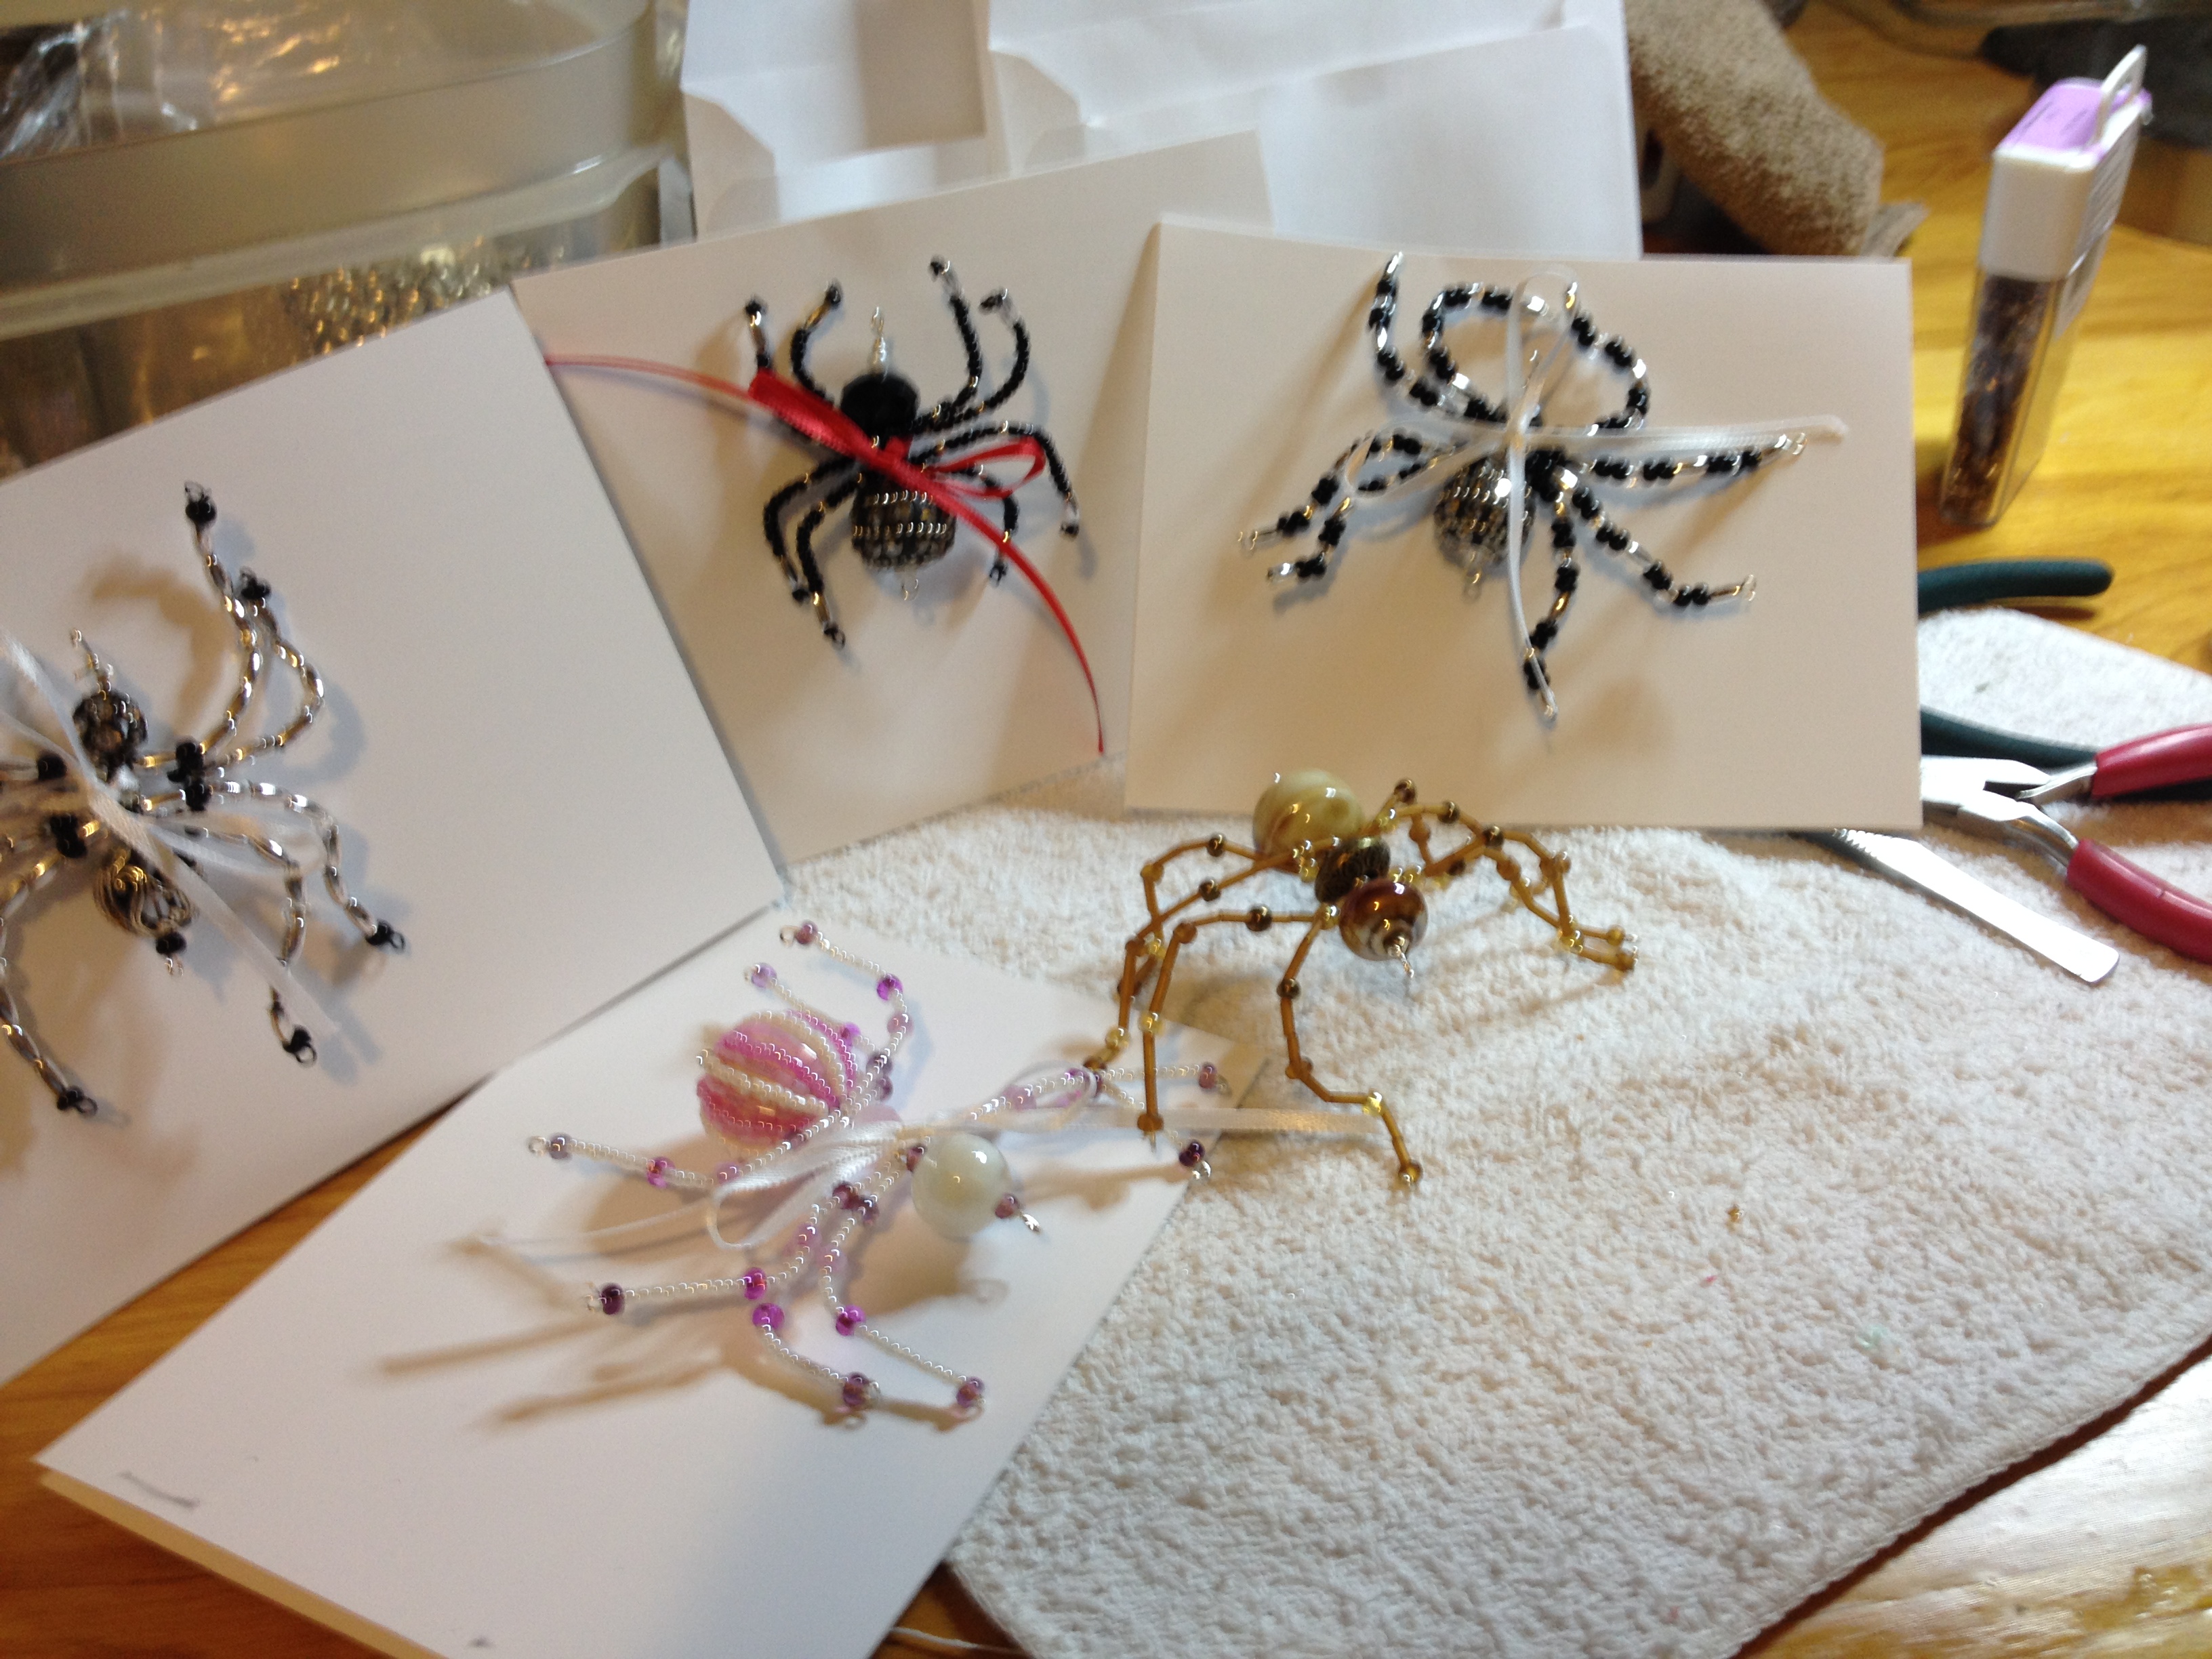
First, let’s make some sparkly, pretty spiders. Size is your choice, I wanted them to fit my cards, but you can do bigger or smaller to suit your taste. The sizes listed are what worked best to fit on the standard card stock I printed the story on. I found some beautiful beads at the craft store, but you can find amazing ones online or in your unused jewelry box.

You will need for each spider:
Large bead for bottom (22-24mm)
Flattened bead for middle (20mm)
Smaller bead for head (16mm)
Tube beads, seed beads, mixed beads for the legs (I used mixed glass beads)
Eye pin
Beading wire (20 gage gold) color to complement beads
Round tip pliers
Wire cutters

I like the mixed bead boxes for this project. The assortment of beads and colors can do hundreds of combinations for the legs. It is also a good way to use up leftover beads. *tip: I work with a wash cloth nder my beads, it keeps them from rolling around, and fingertip moistener makes them easier to grab.

Start with 4 pieces of beading wire 6 inches long. These will be the legs. Bend a small circle at the end, put beads on until you have 2 1/2″ filled, bend a loop in wire, this will be the center loop. Bead the reverse of what you did, to do the other leg and end with another circle.
Do four of these, repeating the same pattern for each leg.

Take the headpin (with the eye on the end) and put on the largest bead, (mine kept sliding off the eye, so I added a smaller glass bead to make it stay). Next, thread on two of the leg wires, the middle flattened bead, the two remaining legs, then the head bead. ( I also put a small glass bead here too). Using the pliers, bend the remaining wire into another loop and wind around to snug up all the beads and legs. You want to stiffen up the body, so the legs don’t flop around too much. Clip off any remaining wire. I couldn’t decide if they should hang from the head (climbing up) or the bottom (climbing down) so I put eyes on both ends. You decide! (Mine just sat on branches and sparkled!)

Bend the legs into a pleasing shape. I pulled the front legs above the head, next set facing forward. The back legs supporting the bottom, and slightly pulled back.

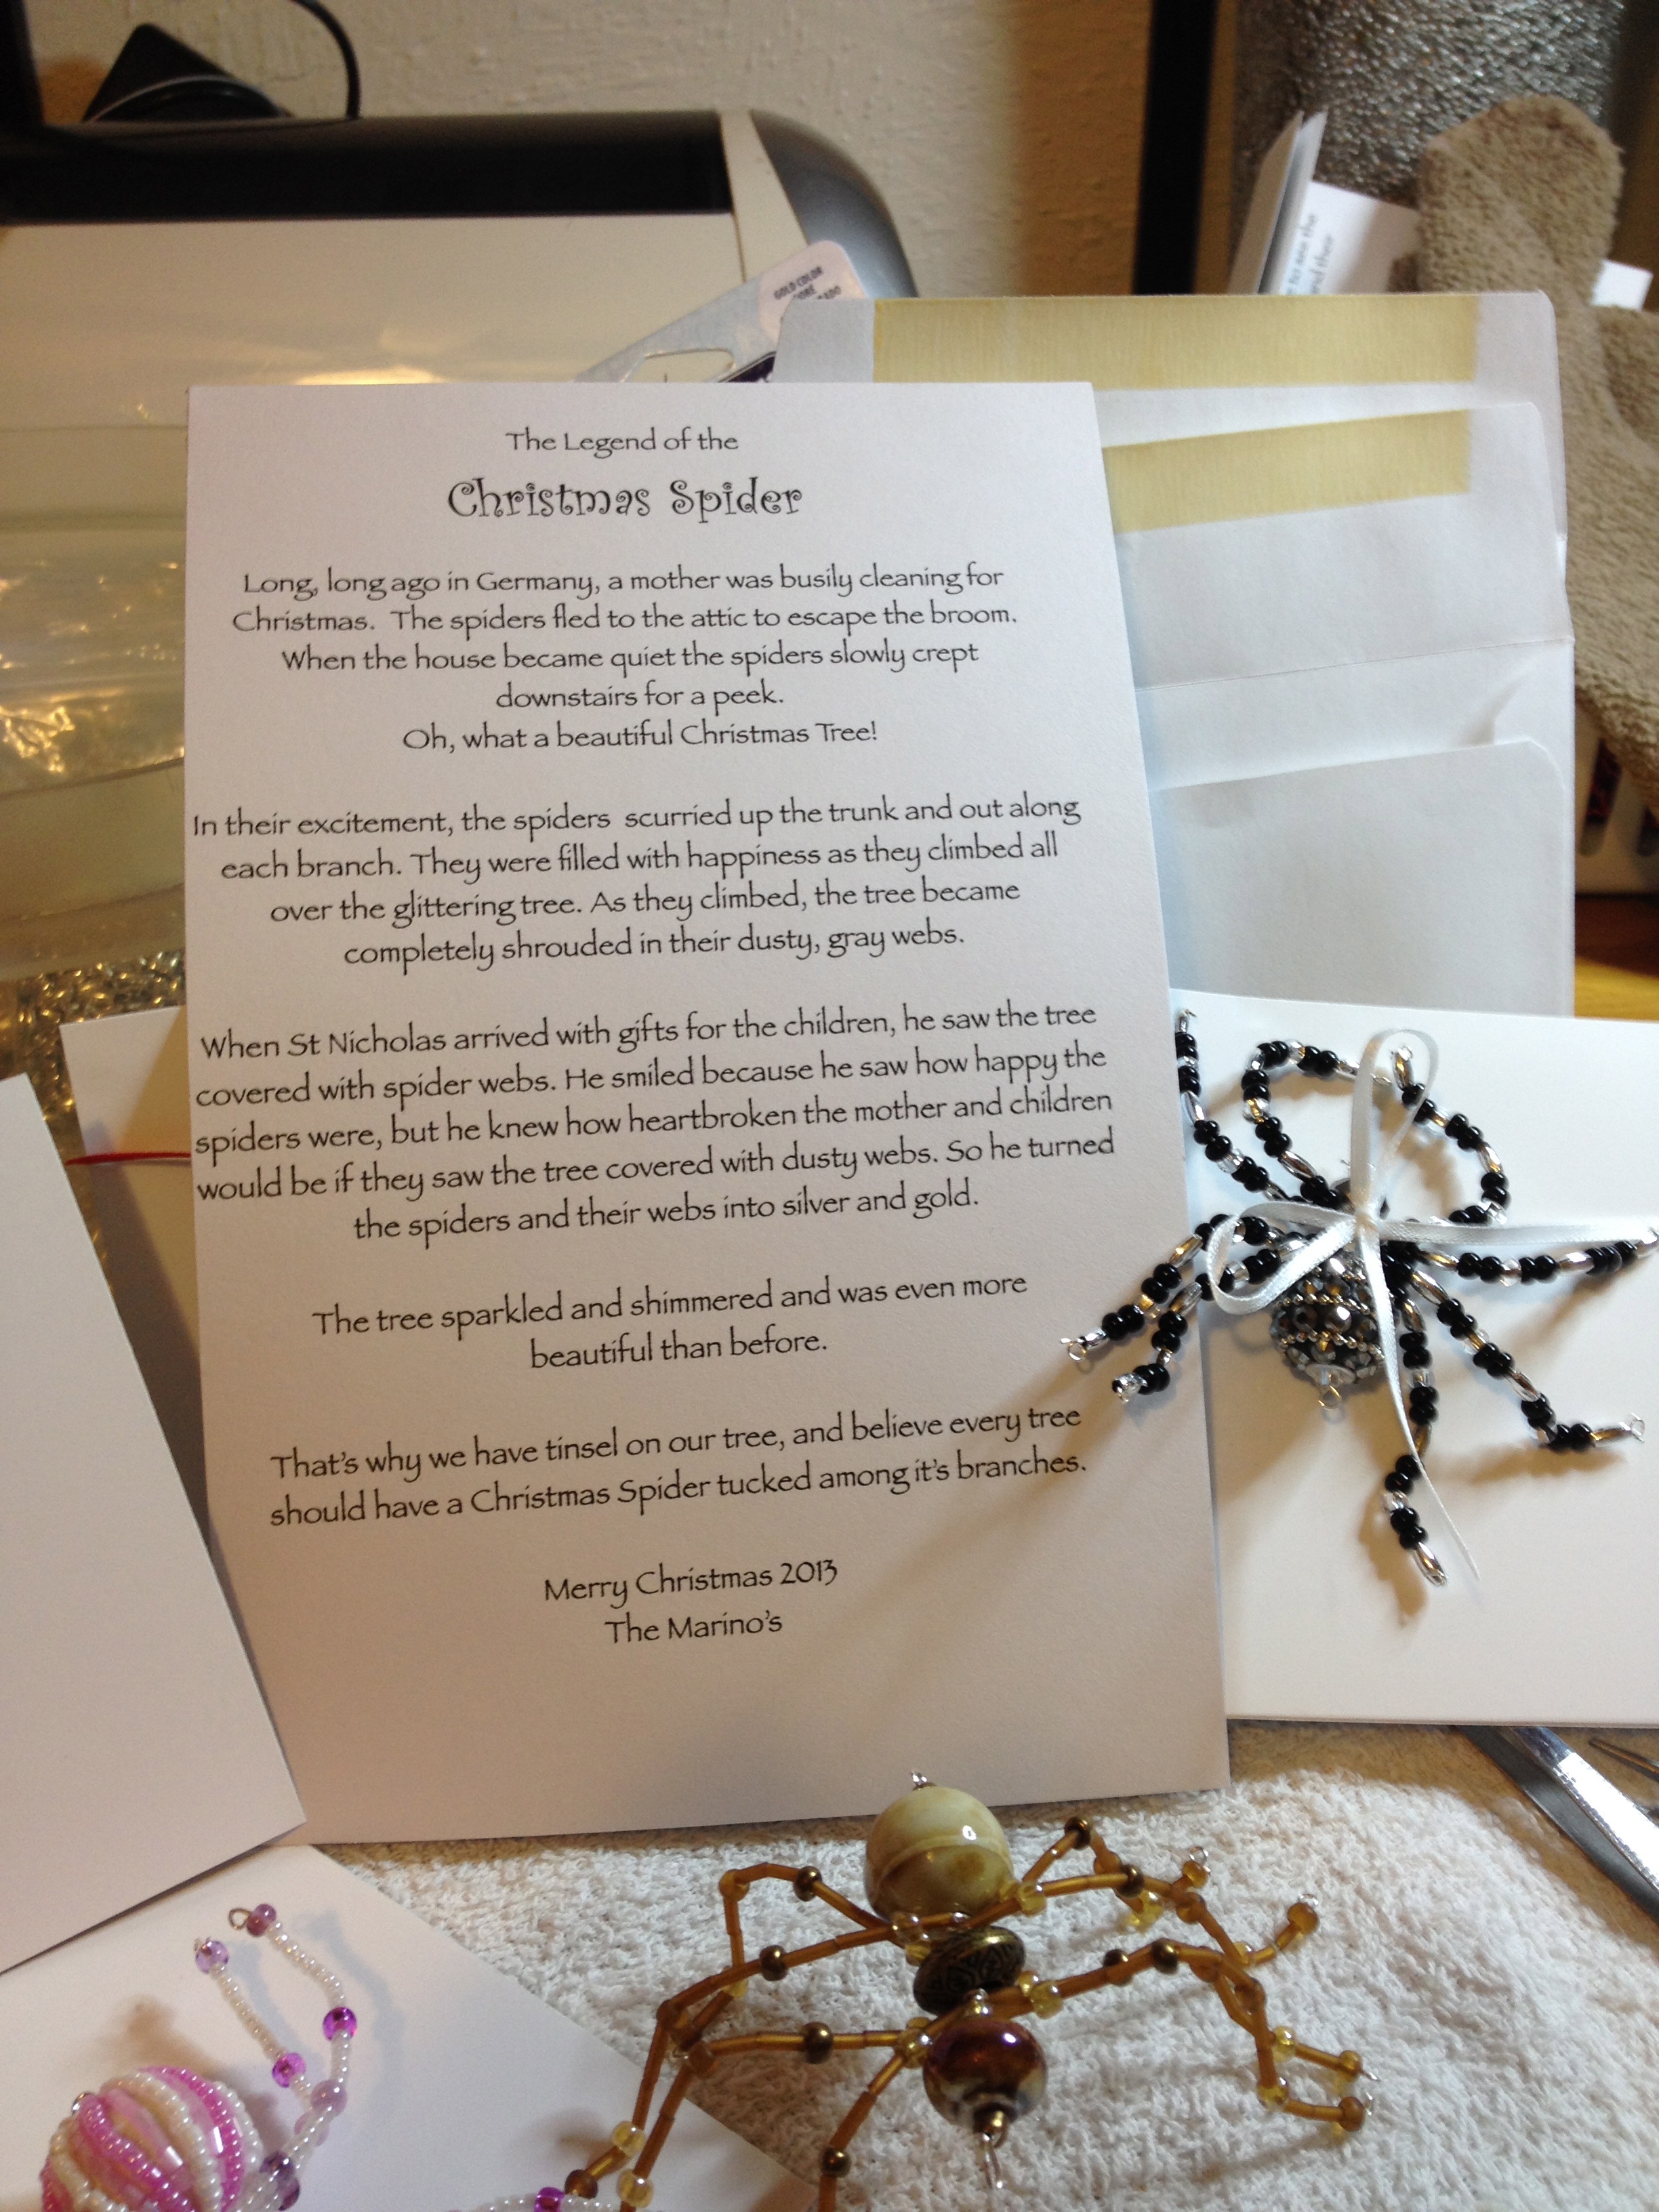
To make the cards, you’ll need card stock, a computer and printer. I think the story is important for explaining why you need a spider in your Christmas tree. By printing the story inside, and attaching the spider outside, it made a nice presentation.

Here’s my version of the Legend of the Christmas Spider: (I edited the version on my cards to fit the font and card size)
The Legend of the Christmas Spider
Long, long ago in Germany. a mother was busily cleaning for Christmas,
so the spiders fled to the attic to escape the broom.
After the house became quiet, once the tree was decorated,
the spiders slowly crept downstairs for a peek.
Oh, what a beautiful Christmas Tree!
In their excitement, the spiders scurried up the trunk and out along
each branch. They were filled with happiness as they climbed all
over the glittering tree. As they climbed, the tree became
completely covered in their dusty gray webs.
When St. Nicolas arrived with gifts for the children,
he saw that the tree was covered with spider webs.
He smiled because he saw how happy the spiders were,
but he knew how heartbroken they would be to see the tree covered in webs.
So he turned the spiders and their webs into silver and gold.
The tree sparkled and shimmered and was even more
beautiful than before.
That’s where the tradition of tinsel first came from
and why every tree should have a
Christmas spider tucked among its branches.
I printed this on the inside of plain white card stock. I left a space in the upper part of the story to punch a couple of holes, that I threaded 1/8″ ribbon through and tied a bow around the spider to attach to the card. You can modify the story, font and spacing to fit your particular project idea. You could also print it on plain paper. Everyone loved the story, and even my Bestie, who is terrified of spiders, loved hers too. A couple of friends told me they hung them from their rear view mirrors, because they were so pretty!
Enjoy!
Debbie


