Easy Glitter Cupcake Ornament

IMG_1461

Ok, we’re good friends by now, and you know, I’m completely obsessed with Christmas and glitter.

So this post shouldn’t come as a complete surprise. I’ve seen some pretty cute cupcake style ornaments for the tree,

but let’s take it up a notch.
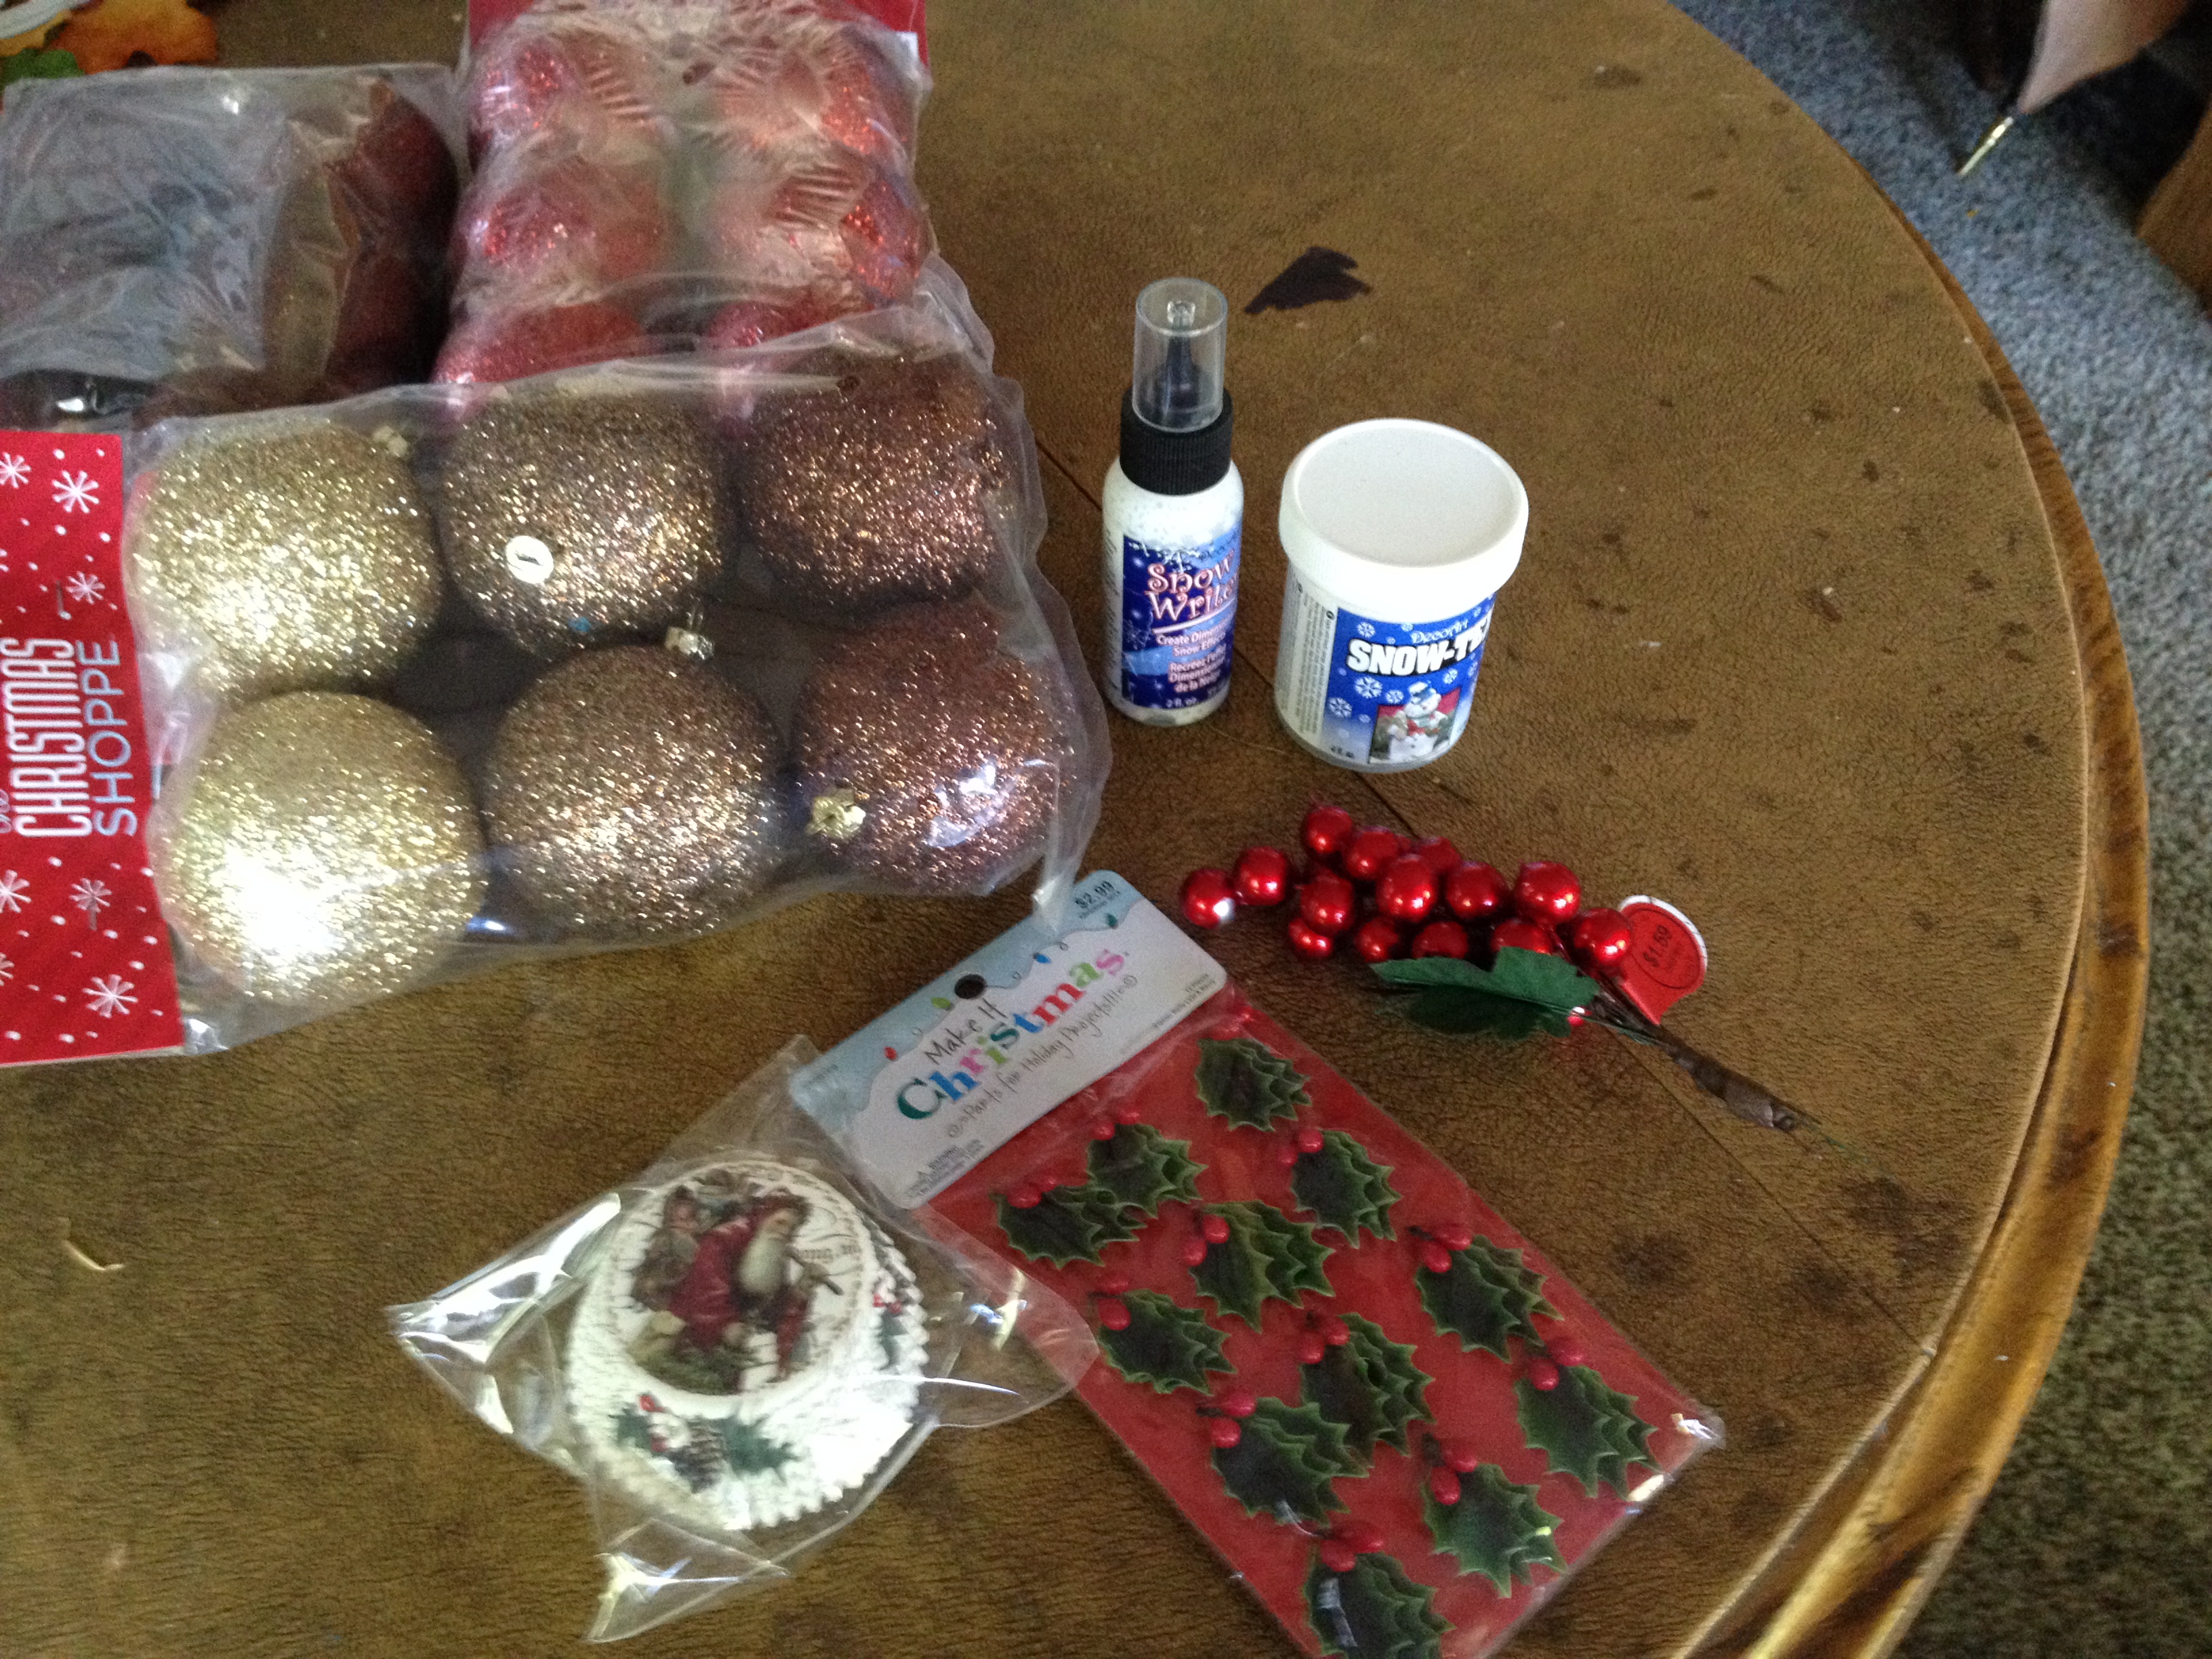
IMG_1455

Supplies needed:

70mm glitter non-breakable ornaments. I choose brown (chocolate cake), red (red velvet cake),

gold (yellow cake), and copper (spice cake)

vintage printed cupcake liners

plastic holly leaves with red berries

Snow Writer, dimensional glitter pen and spread (wasn’t sure which look I wanted)

Hot glue and glue gun

IMG_1456

Gather up your supplies, the “lobby” store already has them out, the others will be stocking them soon.

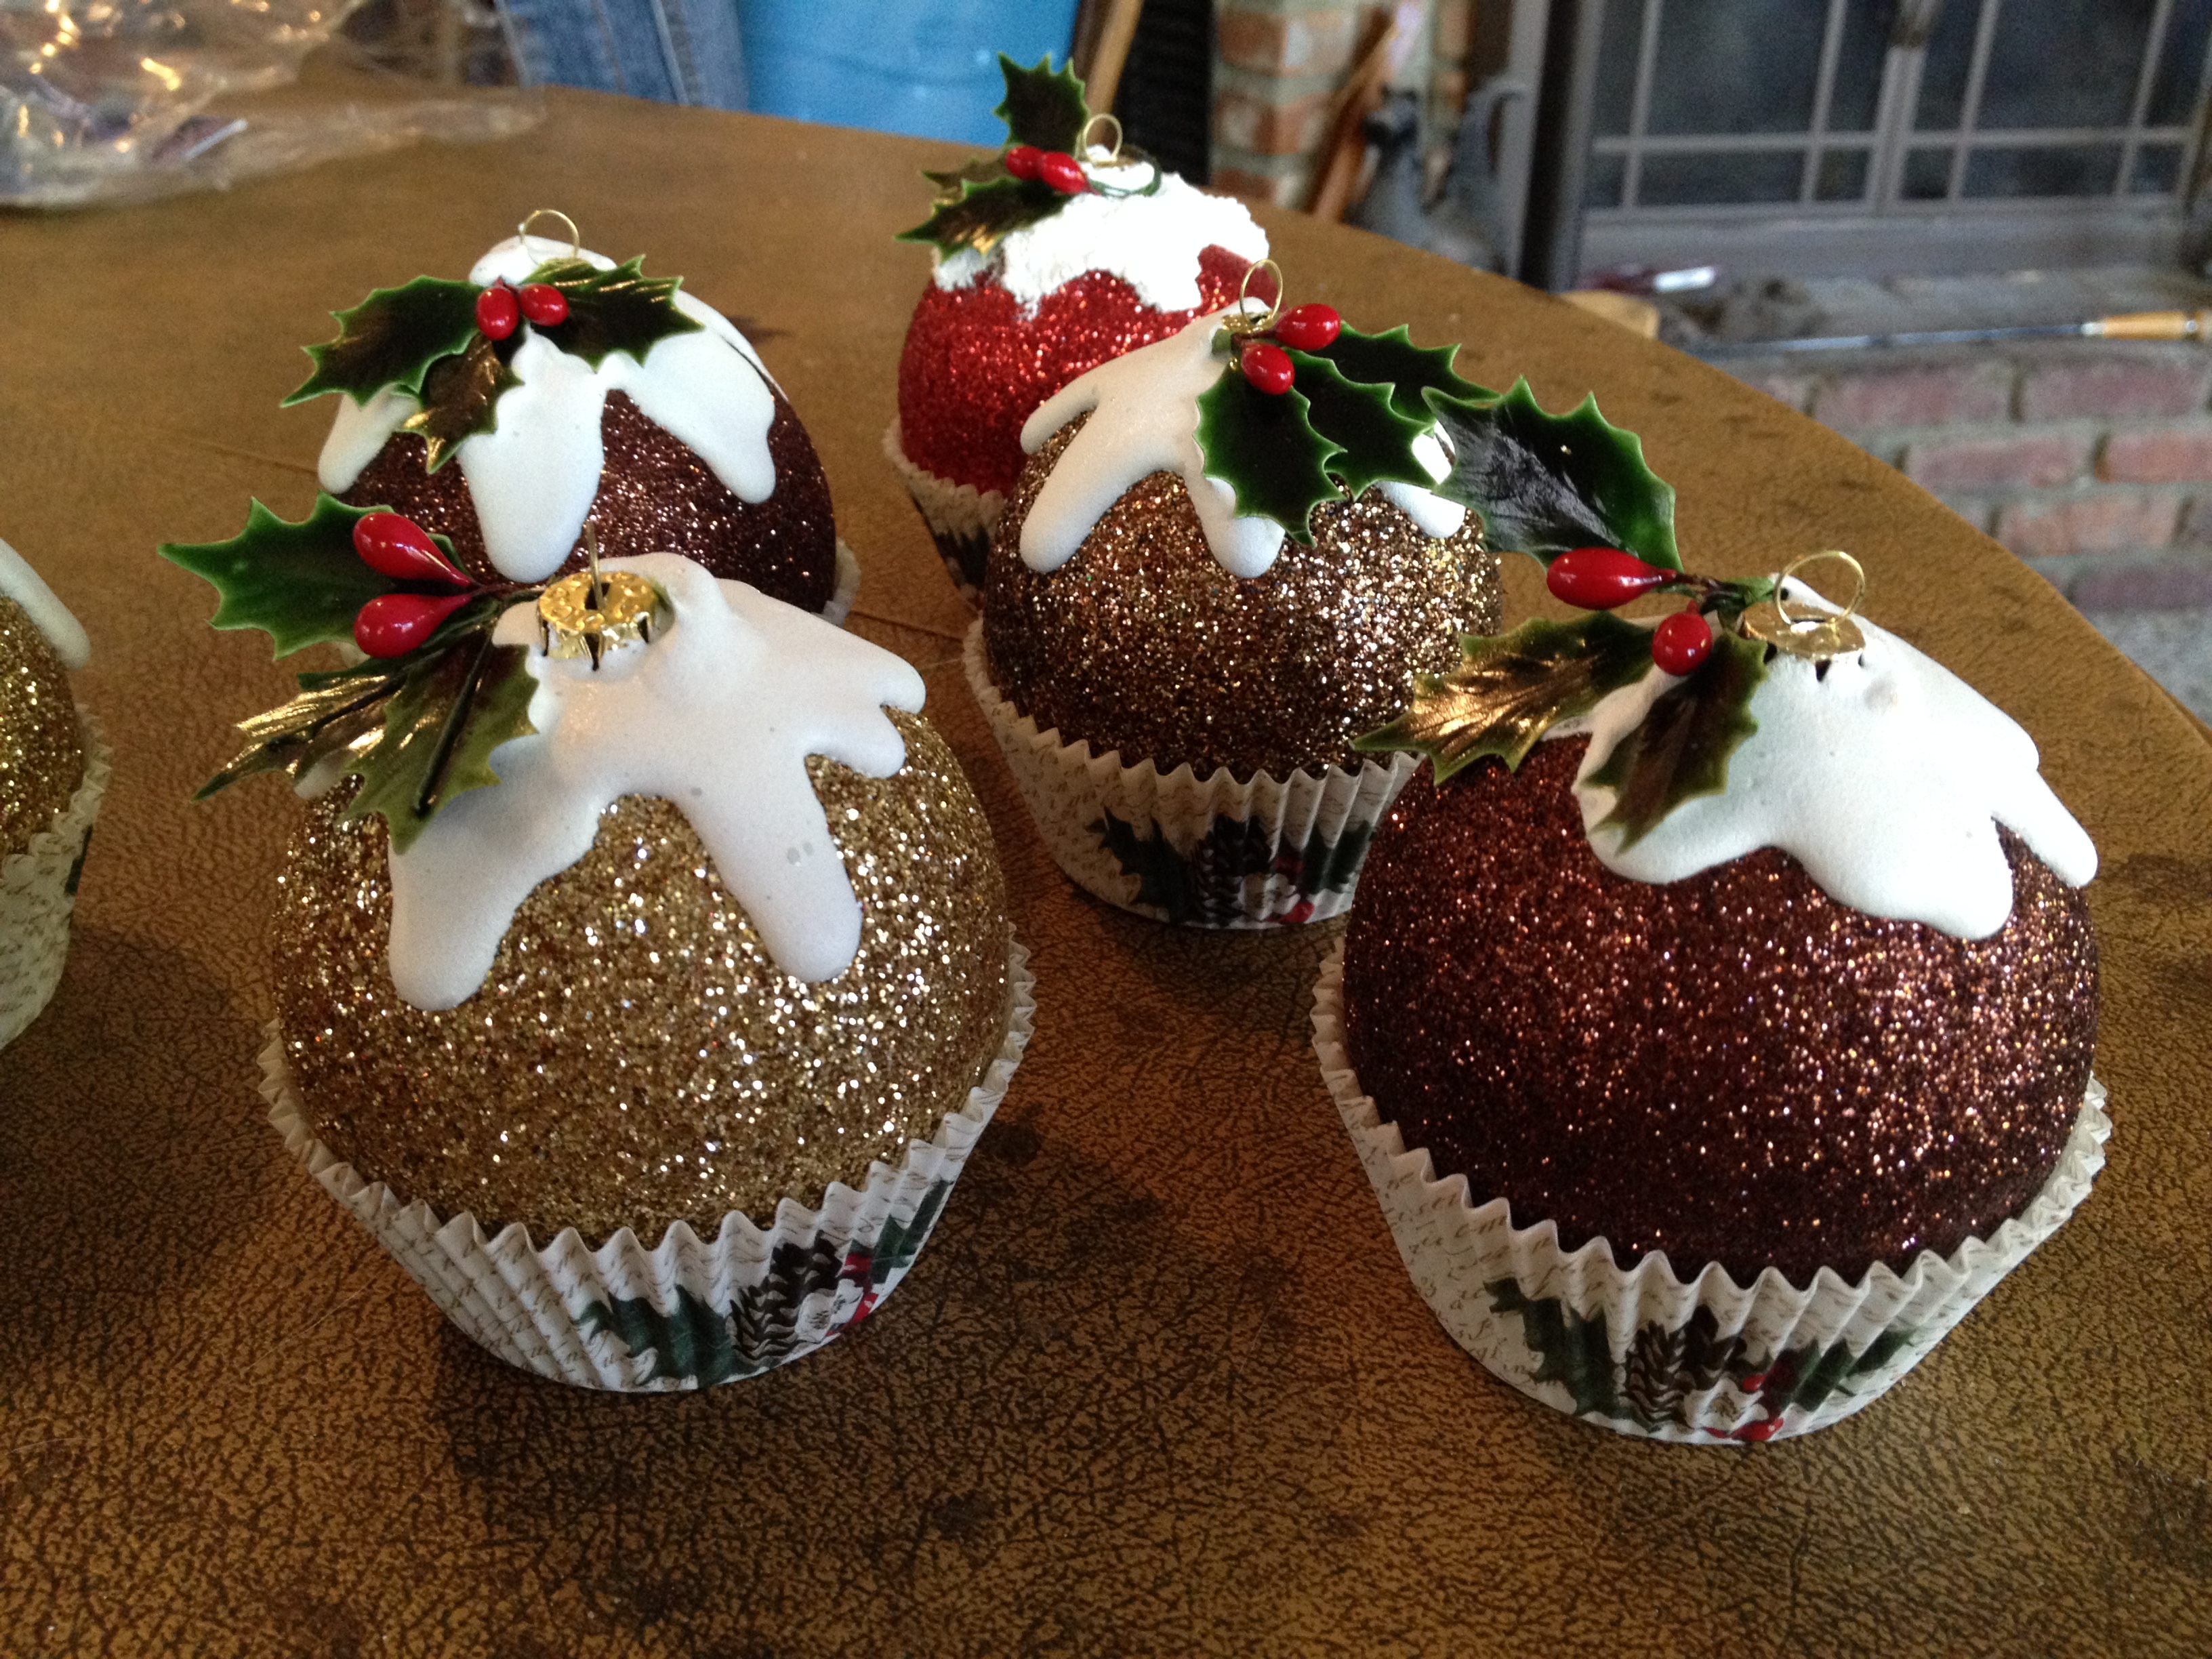
Start by hot gluing the ornament into the cupcake liner with the top up, or slightly tilted (your call).

I used two liners and put a drop of glue in the bottom one to make them thicker.

I let it stand a couple of minutes to cool off.

IMG_1458

Using the tip of the snow writer, frost your cupcake and let it “drip” down the sides. This stuff dries hard, but will run a little when you put it on.

IMG_1459

I wrapped the holly stem around the hanger top, and put a little “frosting” over the stem.

Set them aside for the “frosting to harden. (2-3 hours)

IMG_1461

Ta Da!! Yummy cupcakes that sparkle and shine!!

Perfect for that candy/sweets tree I’m planning. And I didn’t even have to turn on the oven!

Enjoy!

Debbie

No Sew “Quilted” Ornament

IMG_1411

So I’ve seen so many of these beautiful ornaments on Etsy and Pinterest. I thought i’d take a stab (pun intended) at it.

They’re surprisingly easy once you get going, but my thumb sure got sore quickly!

 IMG_1374

Supplies / tools needed:

styrofoam balls 2 1/2″ I started with the traditional “crunchy” kind and then tried the smoother more dense kind.

tip:  I have to admit, the denser ones were harder to push the pins into especially once you were to row 3-4.

1 solid color and 1 pattern ribbon flat, non wired edge 5/8″ wide

2 complimentary color ribbons 1/8″ wide

tip: the sheer, and wired ribbons were more difficult to work with and didn’t give the same look

Sequin pins or applique pins (they are shorter and sharper)

Eye hooks or wire for creating hanging loop

scissors

IMG_1375

I began by cutting short 2″ – 2 1/2″ strips of each color

24 strips of color A (inside color)

32 strips of color B (second color and extra to wrap around ball)

IMG_1388

Find the starting point, this will be the center of design.

You can mark the other side by measuring around the ball and dividing in half for placement.

Pin the center of the first ribbon, place the pin near the top holding the ribbon right side down.

Next fold down, and pin each side.

Be sure to fold over the center pin head so you can’t see it, and pin below the bottom edge of the ribbon underneath it.

Turn the ball around and put the second one directly opposite it. Then fill both sides the same way (4 ribbons used)

IMG_1380

On this one, I used the patterned ribbon first, and then begin the second row. Place the center of the second color 1/2″ below the point of center pieces.

Place one ribbon at each point, then place one at the space between each point (8 new points)

IMG_1381IMG_1383

This way, they overlap one up, one down, one up….etc.

IMG_1384

Work the third row the same way, starting with the lower points (4 of them, and then layering the next 4 last) using the contrast ribbon.

The fourth row is the same with the solid ribbon. Trim the edges so that it covers half of the ball.

Turn the ball over and locate the center point, and repeat the four rows above.

tip: try to line up the points with the other side, it just looks better when you’re done.

IMG_1385

IMG_1386

Since this one finished with the solid green ribbon, I cut a piece to wrap around and hide all the loose ends. I trimmed them to lay flat and put two pins in the ribbon,

wrapped it around, and finished it with 3 pins and folded back the raw edge.

IMG_1400

I decided to add a sequin and head pin to the center of each side.

IMG_1402

An eye hook and a couple 1/8″ ribbon bow for hanging….

IMG_1401

Ta Da!!! couple sore thumbs and fingers, but a really pretty,no-sew, quilted ornament!!

IMG_1412IMG_1411IMG_1409

Careful, they’re addictive, and the color combos are endless!!

Enjoy!!

Debbie

Rock Candy Ornament

IMG_1395

So it’s September already, and I’ve decided that Christmas in July didn’t happen, and August was a blur….. time to start making holiday stuff and I’m already behind! i was thinking this year Id make a candy/cookie/sweets themed tree this year. Seems I have to start somewhere, so the idea is usually first, and the how-to later.

Lets get started with a super easy one.

Supplies needed:

wooden beads

12″ dowels

16 gauge wire

mixed plastic faceted beads

hot glue/glue gun

white/wood glue

IMG_1389

I started by separating the beads by color. One of those zen OCD tasks that completely relaxes me, until the dogs bump my table and I find myself crawling around on the carpet picking them all up.

IMG_1396

Cut the 12″ dowels in half and glue a wooden bead with  the wood glue on the bottom of each.

IMG_1391

Next cut a 3″ piece of wire and twist a small eye on the end, then I wrapped the wire around the top of the dowel to make a hanging loop.

Tip: You could also use ribbon or colored wire but I prefer mine to disappear in the tree.

IMG_1393

Using the hot glue gun, begin adding the beads about half-way up the stick and cover completely over the wire and the top of the dowel. Be careful when using the hot glue, you can get burnt in a second. Make sure to slide them around randomly so they’re not straight rows. I stacked extra beads toward the top to give it more of a taper look like the candy has.

Tip: after you have made several of these, use your blow dryer to vaporize the “spider” strings the glue gun leaves behind.

IMG_1395

So the first bag of beads yielded 7 finished ornaments, looks like its back to the store for more beads. I have to laugh, hubby thought they were real!

So enjoy your day crafting!

Debbie

Chardonnay Angel (Pinot, Moscato or Merlot)

IMG_0769

I have another confession, I really don’t drink much wine. The corks used here, were bought from the craft store. Yes, I’m more of a cocktail drinker, not a fine wine connoisseur. But you can certainly consume until your hearts desire, and collect your own personal supply of corks!

IMG_0745

Supplies needed for these “chardonnay” Angels:

Wine Corks (from the craft store or last night)

Angel Wings (I inherited these beautiful lacy ones from my Mom’s stash)

Beads, tassels, charms, eye pins, jump rings, sequin pins

pliers and wire cutters

IMG_0747

I started by attaching the wings to the back of the cork with sequin pins.

IMG_0750

Next I found a pretty head bead and used an eye hook and smaller seed bead (to keep it from sliding off) and pushed into the top center of the cork.

IMG_0753

Another eye pin with a tassel on the bottom, some pretty beads on the stem. Push this into the bottom of the cork (centered). You could do multiple strands of beads, chains, seed beads. Use your stash and be creative. I was looking for a vintage, copper and cork combo here.

IMG_0764

Thought she needed a little more sparkle on her cork, so I added seed beads with sequin pins around the edges (top and bottom) of the cork. I did have to take off her wings, should have done this step earlier. Live and Learn! That’s the beauty of doing it yourself. You can add/subtract, take it apart and put it all back together again until it looks the way you like.

So try not to overindulge in the vino, but be sure to save the corks!

Enjoy,

Debbie

Holiday Sparkle Pinecone Ornament

IMG_0704

By far one of the most popular, favorite craft projects ever!! I first made one way, way back in the 1980’s. This idea came from one of my most treasured, inspirational, and loved person,  Aunt Joanie.  She shared this with me when we were visiting from out-of-town, and I came home with a bag full of supplies, and a really sore thumb from pushing in the pins.

Supplies needed for each pinecone:

20mm paillette (some stores call them sequins) usually stocked with the beads

1/2″ sequin pins

3″ egg-shaped styrofoam ball

Craft wire or ornament hooks

1/2″ ribbon

thimble or leather finger guard (if you wish)

scissors

wire cutters

IMG_0707

It has become harder to find the sequins, or paillette’s in the craft stores. It is much easier to locate them online. The actual count per ornament varies somewhere between 80-100. The paillettes have a tiny hole on the edge, the sequins have a larger hole. You can use either but be sure to put the hole out of sight.

IMG_0711

The start is the toughest part. Take the first 3 sequins (paillettes)  bend and overlap these into a cone shape, and secure to the pointy end of the styrofoam egg. Make sure the tip is closed, you don’t want to be able to see the styrofoam through a hole.  I used longer straight pins and a small bit of glue to secure them. Then, start pinning a row halfway below the start working around overlapping each sequin, pinning through both. Kinda like fish scales continuing around in the same direction.

IMG_0713

Work around, and around, dropping down as you go, covering the pins in the upper row, until you cover the egg. Your thumb may become numb. The more you do, the tougher your digit may become. I tried to use a thimble and a leather finger guard, but couldn’t feel the pins and got frustrated. My solution was more fingertip moistener (to grab them) and doing a pinecone a day until my thumb toughened up.

IMG_0717

As you come to the bottom of the egg shape, even out the drop but continue in the same direction until you cover the end of the egg. They will be flatter, but still need to stay overlapped and in the same degree of drop.

IMG_0715

Once you cover the bottom, put one final sequin over any pins still showing. Add a hanging hook or loop and tie with a ribbon. Hook or loop, your choice for hanging.

IMG_0718I actually hang mine without ribbon snugged up against the tree branches like a real pinecone would hang. The metallic and holographic finishes are so pretty, and they reflect the lights from the tree beautifully.

Here’s another one I made with “shell” or pearl finished paillettes.  I’ve also mixed the colors when I don’t have enough of one color and they looked pretty as well.

IMG_0709

So, from the “Real” Northern California, a sparkly pinecone that will dazzle when hanging on your Christmas Tree!

Enjoy,

Debbie