
So I’ve seen so many of these beautiful ornaments on Etsy and Pinterest. I thought i’d take a stab (pun intended) at it.
They’re surprisingly easy once you get going, but my thumb sure got sore quickly!

Supplies / tools needed:
styrofoam balls 2 1/2″ I started with the traditional “crunchy” kind and then tried the smoother more dense kind.
tip: I have to admit, the denser ones were harder to push the pins into especially once you were to row 3-4.
1 solid color and 1 pattern ribbon flat, non wired edge 5/8″ wide
2 complimentary color ribbons 1/8″ wide
tip: the sheer, and wired ribbons were more difficult to work with and didn’t give the same look
Sequin pins or applique pins (they are shorter and sharper)
Eye hooks or wire for creating hanging loop
scissors

I began by cutting short 2″ – 2 1/2″ strips of each color
24 strips of color A (inside color)
32 strips of color B (second color and extra to wrap around ball)

Find the starting point, this will be the center of design.
You can mark the other side by measuring around the ball and dividing in half for placement.
Pin the center of the first ribbon, place the pin near the top holding the ribbon right side down.
Next fold down, and pin each side.
Be sure to fold over the center pin head so you can’t see it, and pin below the bottom edge of the ribbon underneath it.
Turn the ball around and put the second one directly opposite it. Then fill both sides the same way (4 ribbons used)
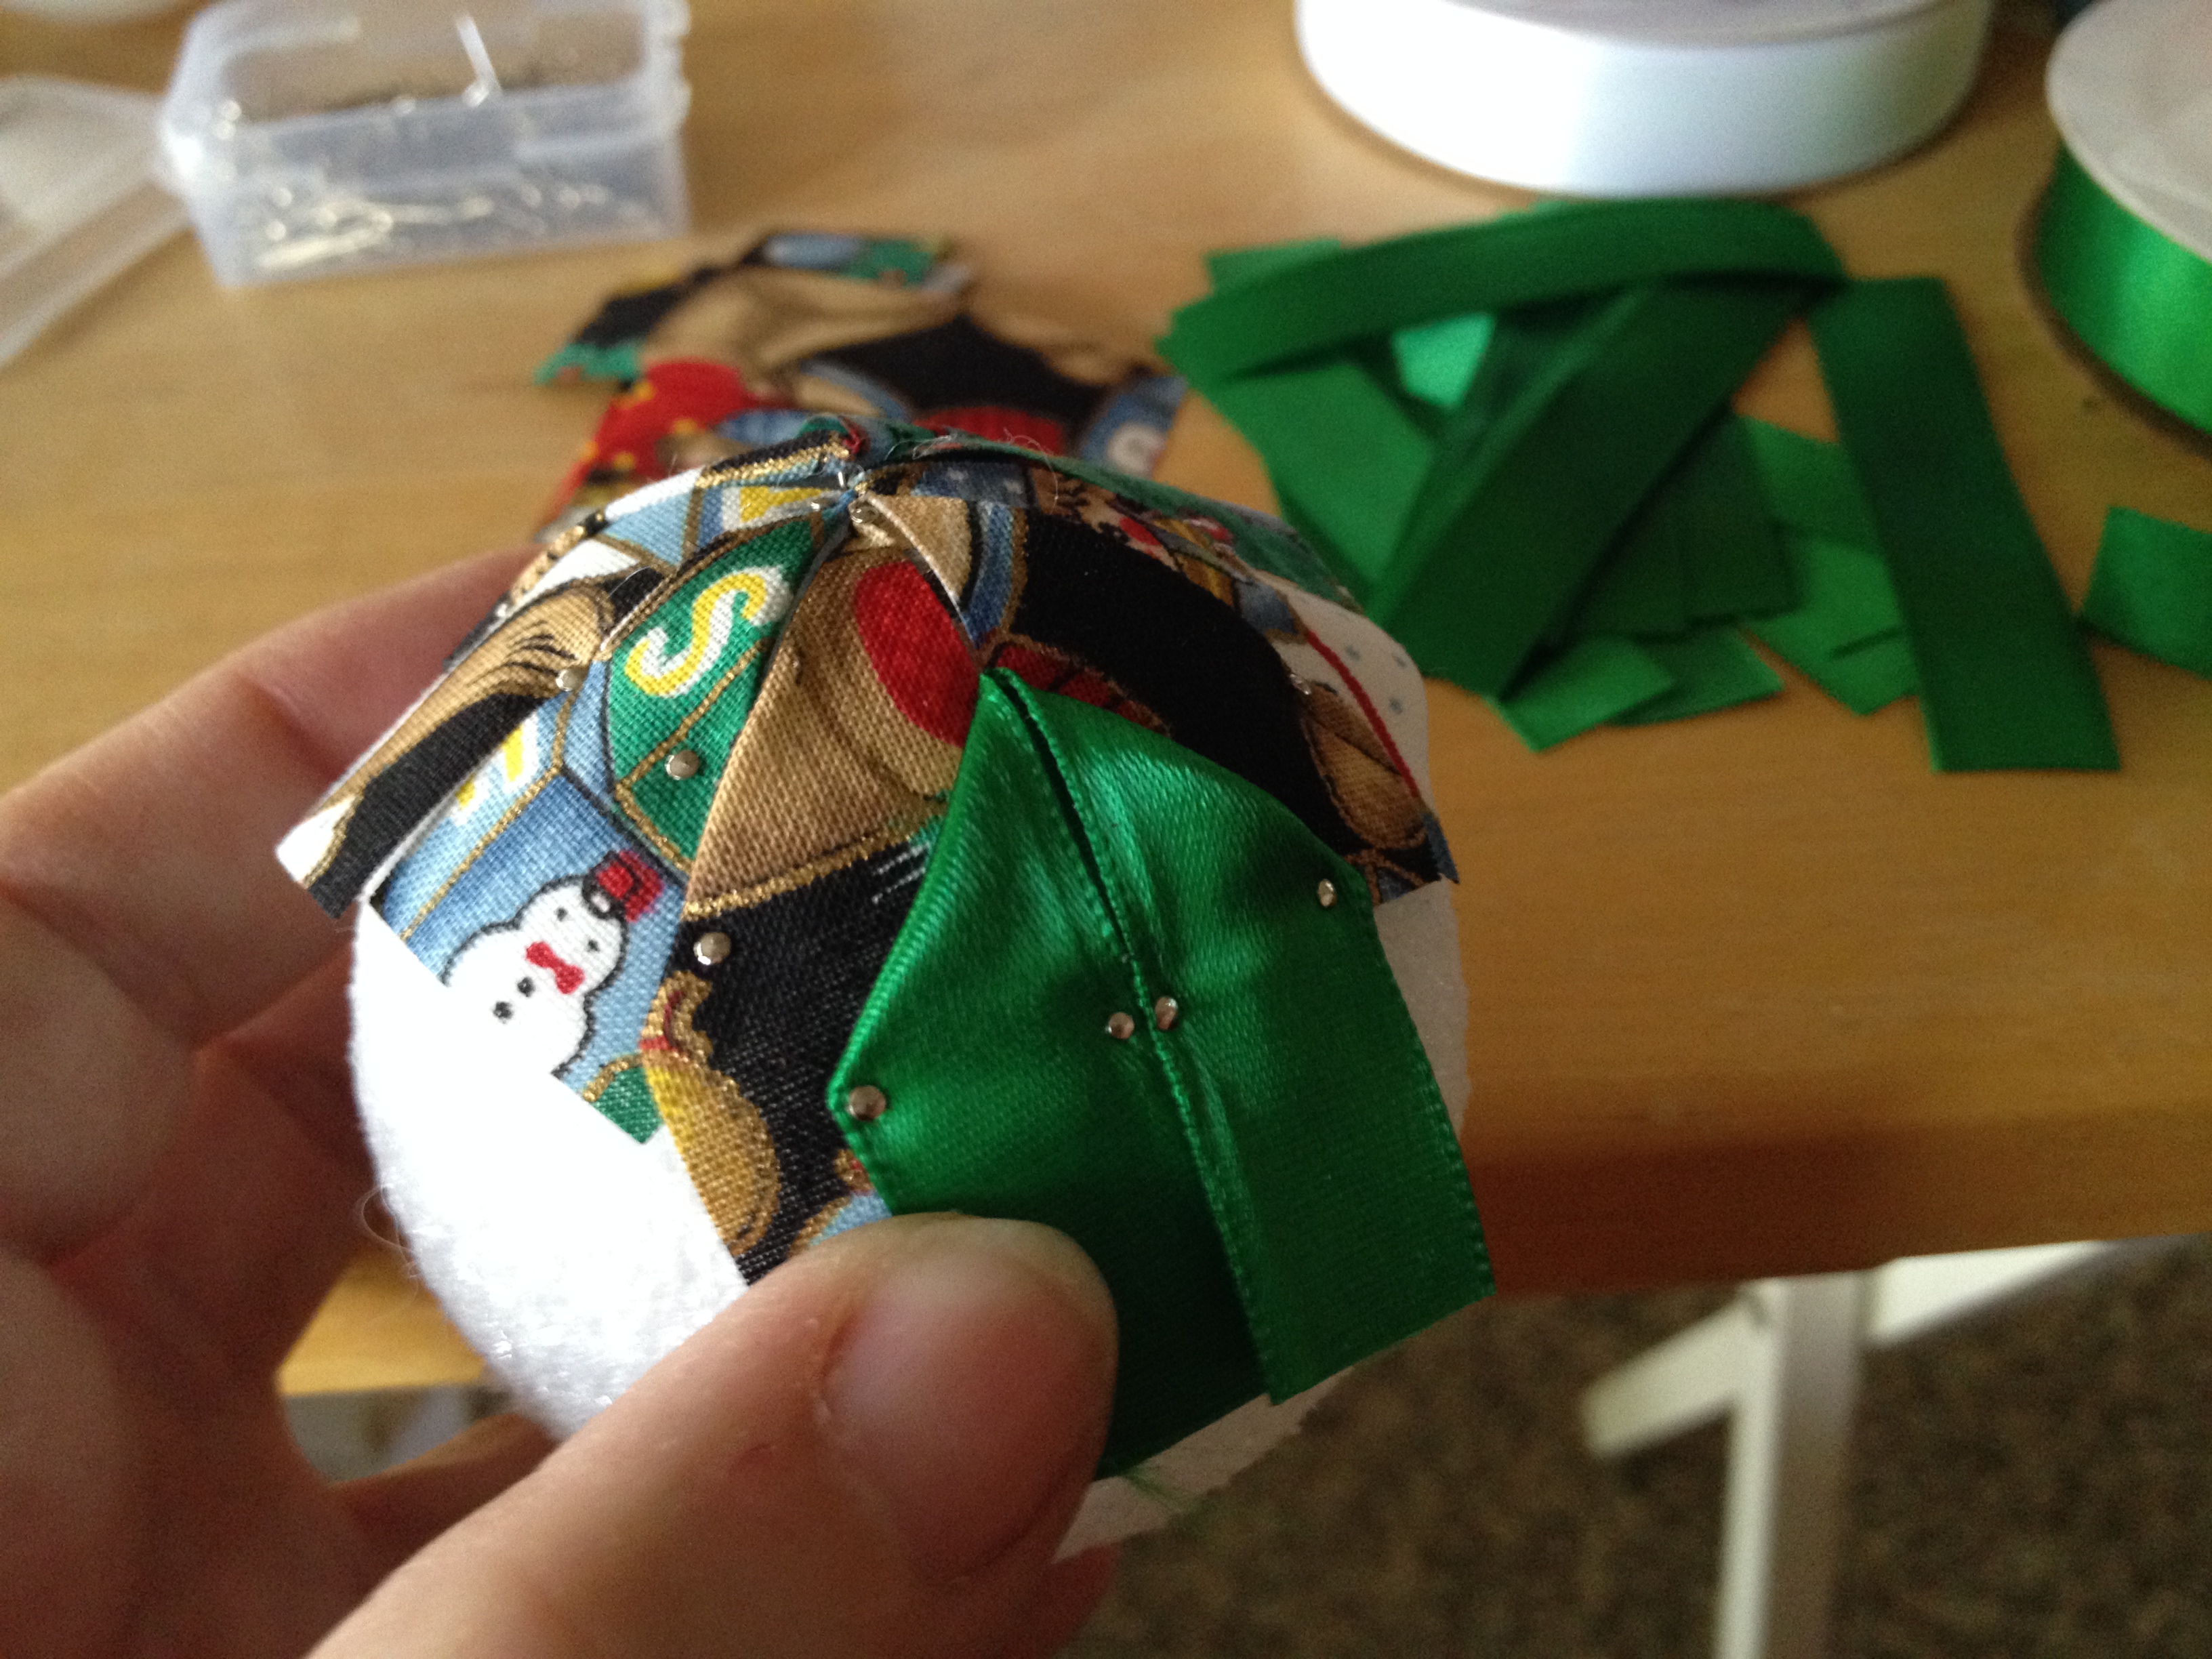
On this one, I used the patterned ribbon first, and then begin the second row. Place the center of the second color 1/2″ below the point of center pieces.
Place one ribbon at each point, then place one at the space between each point (8 new points)

This way, they overlap one up, one down, one up….etc.

Work the third row the same way, starting with the lower points (4 of them, and then layering the next 4 last) using the contrast ribbon.
The fourth row is the same with the solid ribbon. Trim the edges so that it covers half of the ball.
Turn the ball over and locate the center point, and repeat the four rows above.
tip: try to line up the points with the other side, it just looks better when you’re done.


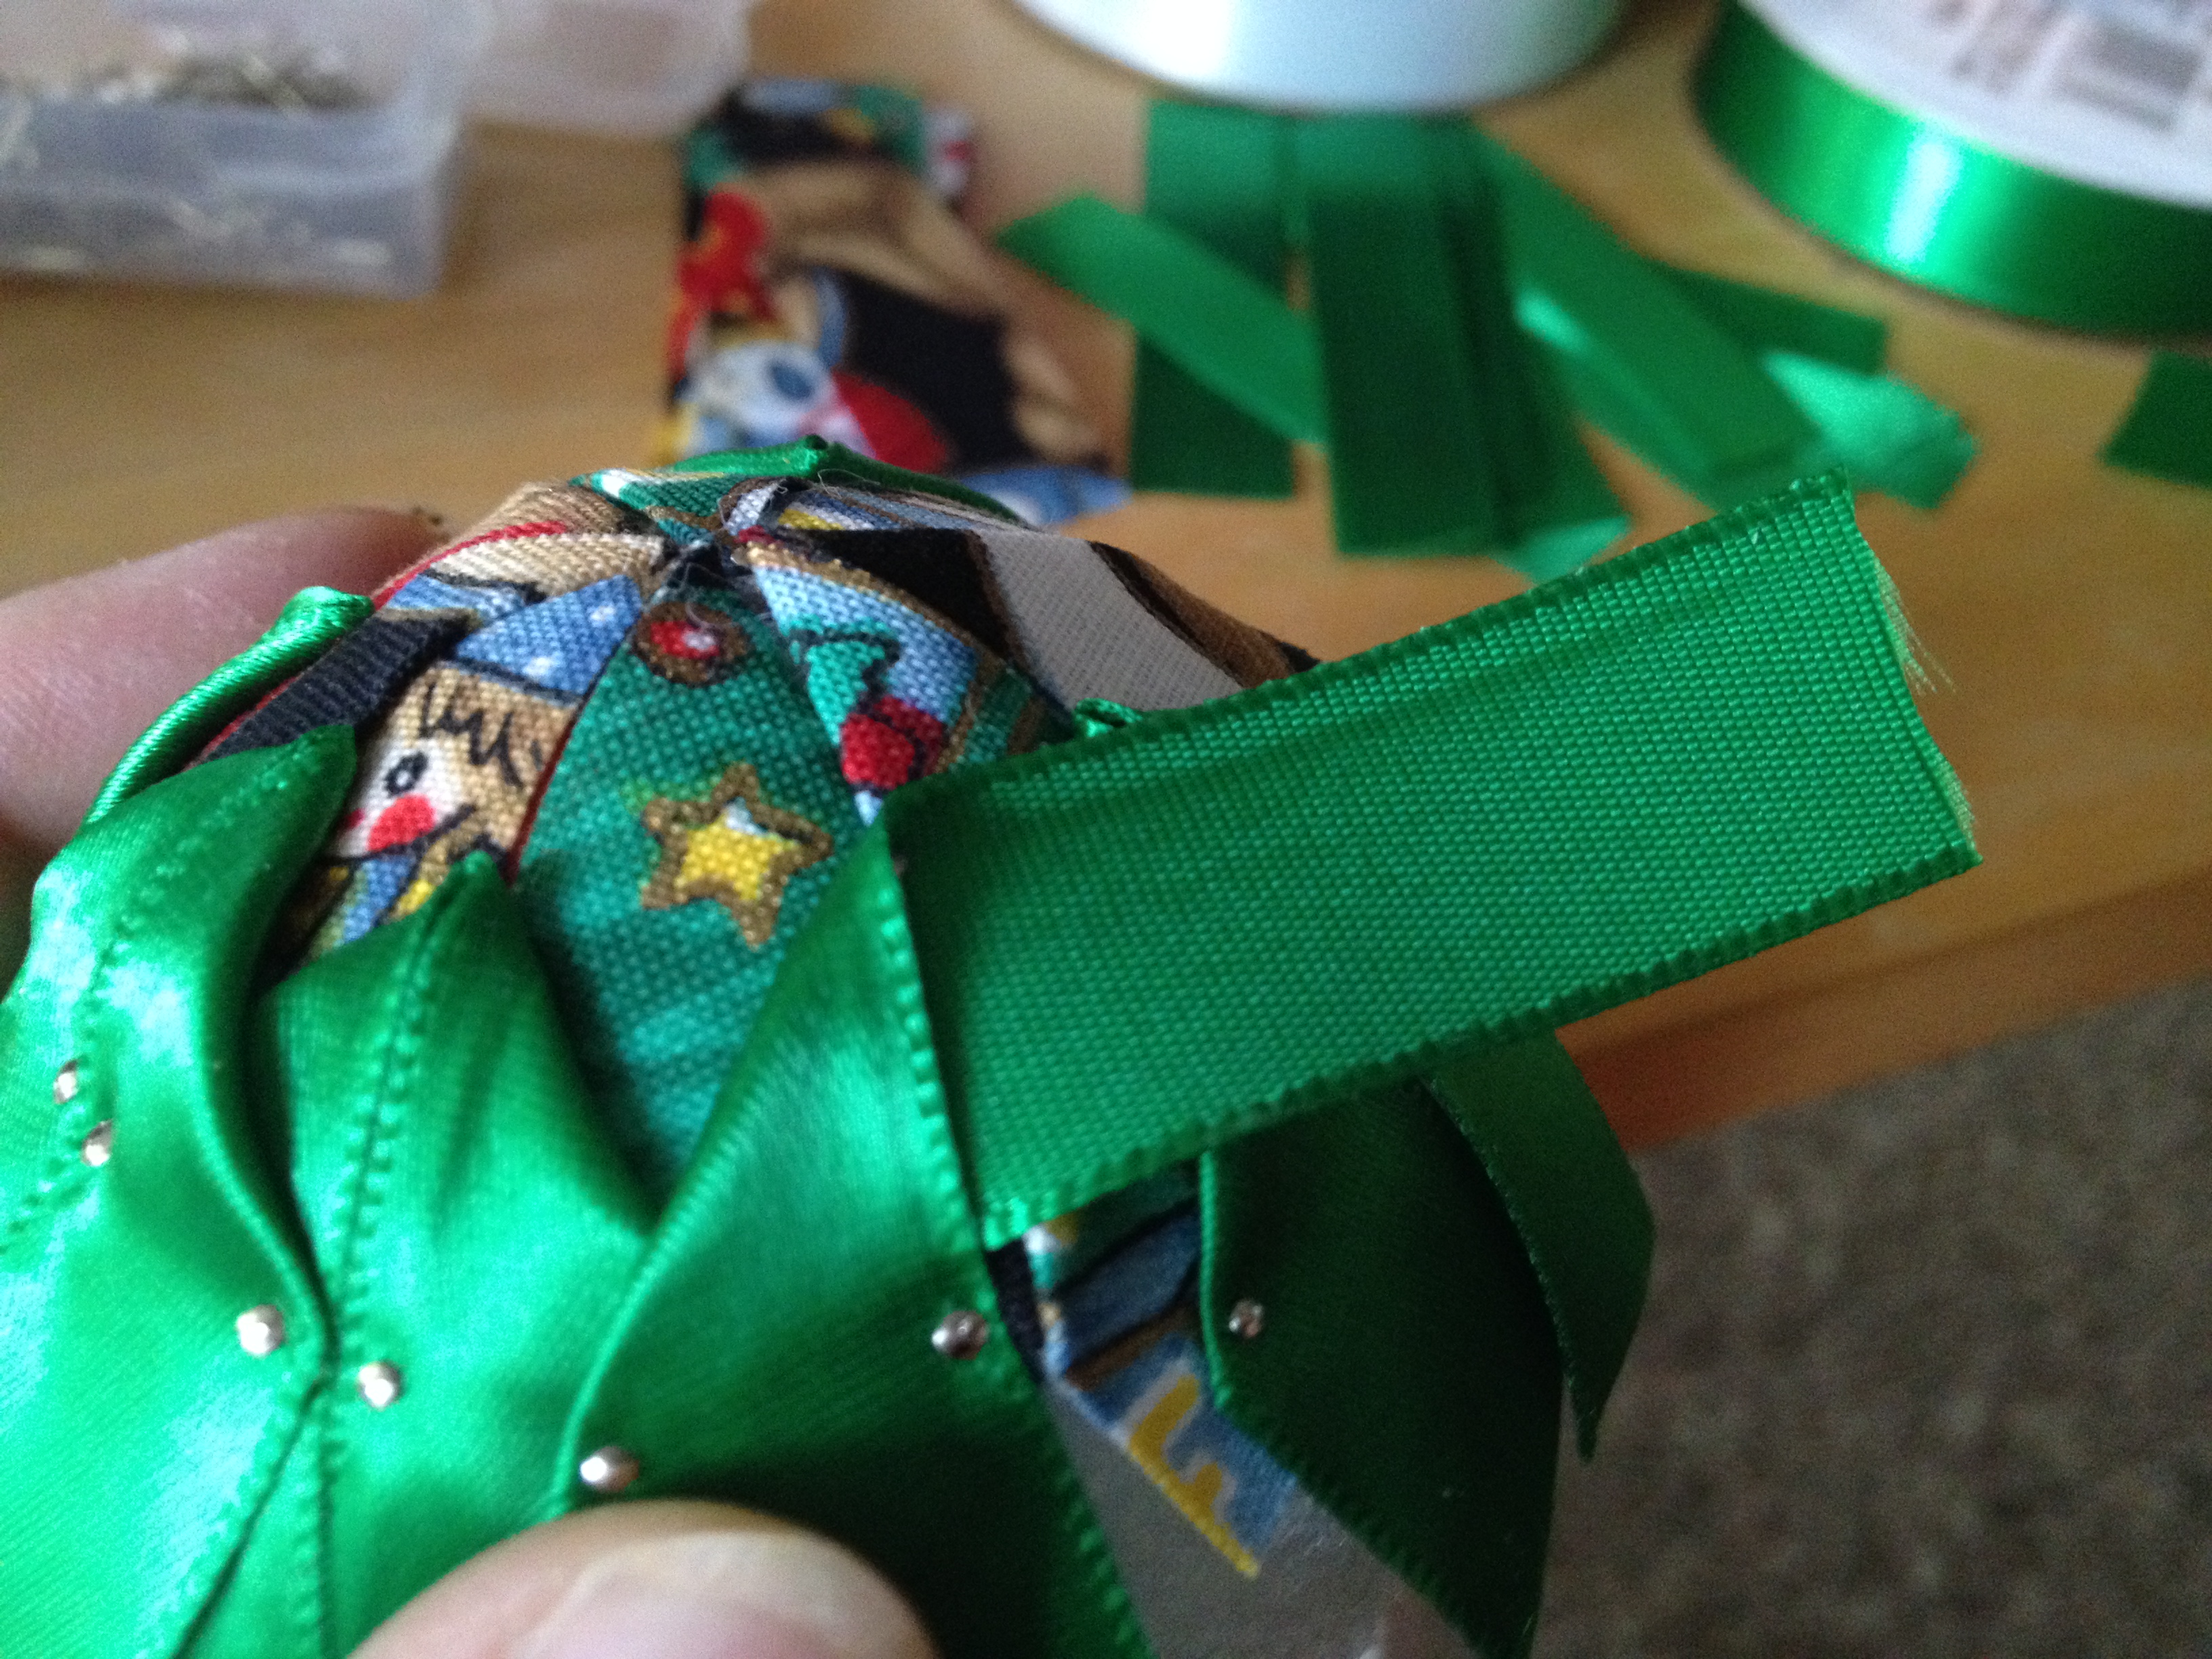
Since this one finished with the solid green ribbon, I cut a piece to wrap around and hide all the loose ends. I trimmed them to lay flat and put two pins in the ribbon,
wrapped it around, and finished it with 3 pins and folded back the raw edge.

I decided to add a sequin and head pin to the center of each side.

An eye hook and a couple 1/8″ ribbon bow for hanging….

Ta Da!!! couple sore thumbs and fingers, but a really pretty,no-sew, quilted ornament!!


Careful, they’re addictive, and the color combos are endless!!
Enjoy!!
Debbie
