So I saw these darling little rustic birdhouses on Pinterest, and thought to myself: Self, you can do that. So I did, several of them, and more to come. I do have a handy hubby, and he could totally “rock out” some custom birdhouses for me to jazz up, but I opted for getting them done this year.
 So I went to my “not so local” craft store and loaded up a cart of inspiration, and here they are.
Supplies needed for the “Rockhouse”
Unfinished birdhouses (I opted for the plain ones, more space to apply decorative items)
Small polished river stones (you can purchase a mesh bag, or collect your own)
Mastic (pre-made tile glue from the home improvement store)
Copper paint
small paintbrush
plastic knife and fork (for applying the mastic)
Clear Gloss Sealer

That’s all for this basic one, but the possibilities are unlimited. I also purchased tiny seashells, seashell chips, sand and granite landscape rocks. You can also use “found” items like pennies, wine corks, pinecone pieces, moss, twigs, bottle caps, (I was even thinking of coffee beans for my favorite Barista). but for now lets keep it simple.

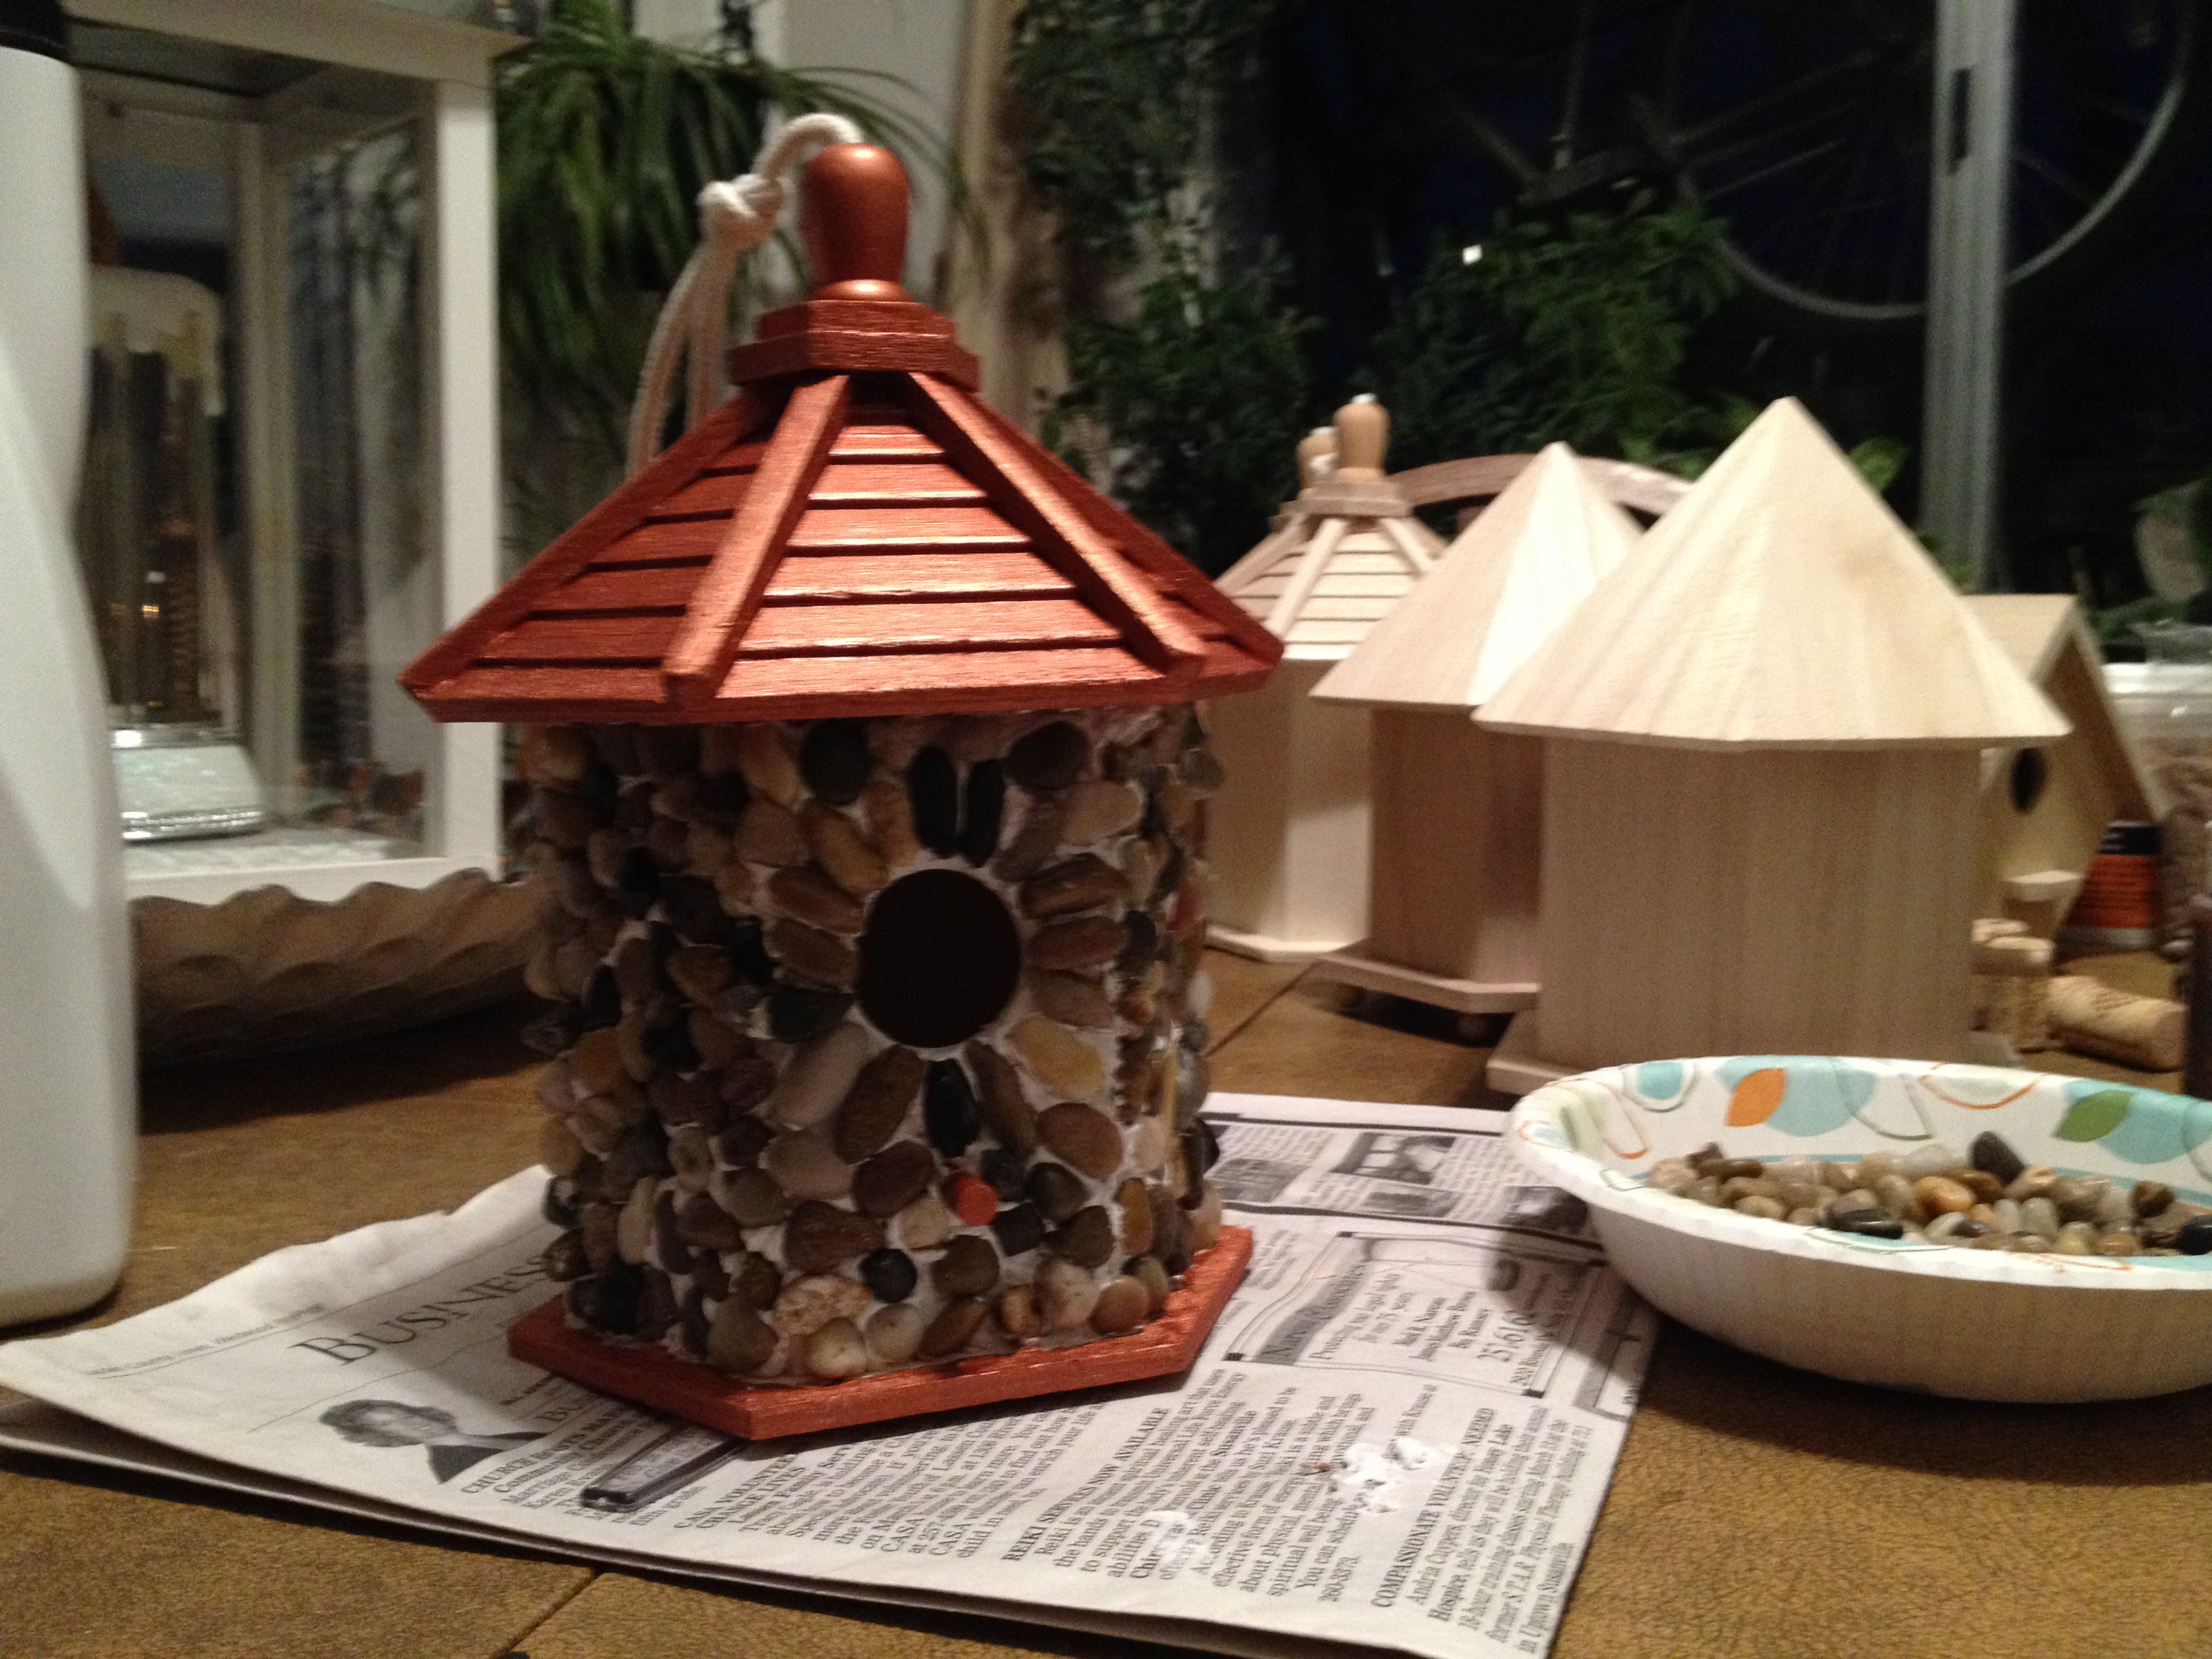
These little pre made houses are so cute, you could just paint and be done but where’s the fun in that? I started by painting the roof metallic copper. I just used my craft paint stash. These are purely decorate at this point so you might want to keep them out of the weather if possible. On this one, I opted to paint the perch too. *tip: I should have painted the bottom ledge before I applied the rocks. Now on to the fun part.
The mastic is pre-made and super easy to work with. I used a plastic knife to spread out 1/2″ layer to the side of the house. I took the fork and made “trowel” lines through the mastic. I figured since this stuff is water-resistant, its made for floor tile, it should hold these tiny rocks and hold up to some garden water. Working around each side, I applied the tiny stones in a random pattern until all of the surface was covered. I did pick out some longish ones to place around the birdie hole, in a starburst shape, and tried to keep too many matching ones touching (Yes, OCD again) but you gotta go with the flow! I’m a sucker for a gloss finish, so I decided to spray the entire thing with clear gloss sealer, plus I intend to put these in the flower planter hubby hasn’t built yet.

Just like potato chips, you can’t have just one….
left to right: the Rock, Beach Bungalow, Mossy Oak, the Mint, Chateau Chablis, the White House and City Lights.
Now accepting applications for new tenants they’re ready to go!
Enjoy!
Debbie


