Teeny Tiny Baked Pies

IMG_0943

If only baking pies were this easy, my hubby would be a happy camper for sure. I spent the afternoon making these for the infamous fairy garden I haven’t completed yet. Saw some inspiration on Pinterest, and decided she should have a picnic in her future forest home. You know me well enough by now, I can never make just one, that would be a sin.

IMG_0934

Items needed:

polymer clay, I used tan, medium brown, cherry red, blueberry, lemon yellow, and white

bottle caps

fondant roller and a sharp knife

IMG_0935

So I started with the crust, just like the edible kind, knead the clay until its soft, and roll with the fondant roller to 1/8″ thick. Using the bottle caps to cut, press into the clay and turn them over.

IMG_0937

I pushed the clay up the sides and into the bottom. Then pinched off tiny amounts of red clay and rolled into tiny balls (for the cherries and blue for the blueberries) and filled each “pie” to a heaping amount.

IMG_0939

They almost look real, right? Next, the top crust. You can roll out traditional lattice, or use a small cutout. One of the ‘pies” I rolled the edges of the crust and applied to the edge.

IMG_0942

Pop them in the oven according to package directions. (265 degrees for 30 mins) They don’t smell as good as real pies, but they look good!!  I also did a couple of Lemon Meringue pies, Just use a darker color for the crust, fill the middle with yellow, and top with white “meringue”. I cut a slice out so you could see the middle of these ones.

Enjoy!

Debbie

Twenty Dollar Whiskey Bottle Lamp

IMG_0927

What game room isn’t complete without a whiskey bottle lamp, I ask you? And if you could make it for under twenty bucks, even better! So last week at work, (I work in a major grocery store) I was holding a rather large bottle of whiskey for a customer, and while admiring the size, shape and price, thought to myself; self, you could make a nice lamp out of that. But since I’m more of a vodka drinker, and hubby is a beer chugger, I had to find a willing whiskey drinker to go halfsies on that bottle. No shortage there, in fact, he had a smaller one empty to boot! You could certainly use any bottle, once you’ve emptied it. Perhaps a favorite wine, spirit, or reminder from the trip to Vegas?

IMG_0903

Items you will need:

Empty bottle, washed and dry

Bottle lamp kit

Lampshade (if you’re still not wearing it)

electrical tape

screwdriver

IMG_0902

You can see by my receipt, I paid about 15 bucks total on the shade and bottle kit. (no drilling necessary if you use one of these) and the bottle could be from the trash. I’m sure if you ask around there’s a whiskey drinker in every circle of friends, as well as the local pub.

IMG_0910 IMG_0912

Follow the directions in the package to assemble the socket. Pull the cord through the bottom hole, separate it and tie a knot so it won’t pull back down. Attach to the side screws and tighten with a screwdriver.

IMG_0914 IMG_0915

Place the socket into the casing and tighten the fittings so they’re secure. I used the pour spout to hold it in place, just snipped the bottom out so the screw would fit all the way down. Most of the kits come with different size stoppers, but the neck on this bottle was too big for them.

IMG_0923

I decided to tape around the connection, for two reasons. First, to make the socket super stable, and secondly to continue the black up like the original bottle neck was sealed. Since my lampshade wasn’t going to cover it entirely, seemed like the best way to “finish” it off.

IMG_0924

The shade had a harp inside that just rests on the socket, snugged it down, put in a lightbulb, plugged it in……..

IMG_0927

Taa Daa!!! instant Man Cave worthy lighting!! I think I’m going to do a solar version for the patio, and I guess you noticed the soap/lotion dispenser too. Well that took about 30 seconds to make. Just wash out the bottle, and insert a pump. The screw threads are universal, and I found the black pumps online at about a dollar a piece.

IMG_1008

So, I’ved added a solar option, gotta take one camping right? Solar light, $5 bucks, bottle free, and some small river stones from the dollar store a buck! Think it’ll get a lot of use this year!

As always never let your imagination go stale, keep on creating.

Enjoy,

Debbie

Fabulous Fairy Gardens

IMG_0741

Meet Giselle, she’s my muse. I’m currently obsessed with fairies and fairy gardens. She’s my inspiration for a looong blog about her home, and the future homes for her friends. Brace yourself, this is gonna be a long one, with more cuteness than you can stand. Lots of teeny tiny, pretty magical things.

IMG_0861

First let’s pick out her a home. Hmmmmm? perhaps a pretty birdcage. Think she would be happy “caught” in a nice white Victorian style. Found this white wire one with a lovely crystal birdie on top at Michael’s, the top opens completely up making working inside easy. Since the bottom had a rather dense border around it, I decided to cut a cardboard circle the width of it to lift her “floor” up to the level of the open bars. This also gave me room to poke items through the bottom, and later the battery pack for something magical….

IMG_0853

I’ve already been working on items for her place, including a table and some lovely wire chairs. Purchased flower pots and a “pickle” barrel. I’ve been secretly collecting some decor items, as well as crafting items too. I laid them roughly out to figure out how big a patio and path I wanted on her “floor”.

IMG_0854

I applied some tacky glue with a paintbrush, and used decorative sand from the dollar store to create the path and patio. Probably could have used sandpaper if I had any, but this was just as easy. Next I added dried moss to the sides, and lined the path with tiny polished stones.

IMG_0886

A wonderful friend of mine, makes tiny chairs out of wire. She did these two “peacock” style green wire chairs from a pin I had pinned for inspiration. She originally made the seats of moss, but they didn’t show up well in the space. I toyed with both a flattened acrylic stone, still too light and finally decided to “upholster” two large button covers with a micro rose print for the seat cushions.

IMG_0850

IMG_0849

 The table was crafted using 20 gauge wire table base, and an oval piece of balsa wood. You could also make a nice one from a small slice of wood from a branch. Just watch your scale.

IMG_0851

IMG_0839

I decided to stain the tabletop a dark walnut. Also used the same stain on the pickle barrels, but top coated them with a gold paint and rubbed off the excess. Using outdoor expoy glue, attached the base to the top after staining. You could paint, stain, mosaic, or leave natural your table top. Whatever you and your muse decide

Since its early morning, I gave her a cup of coffee, some purchased gardening tools, and a teeny tiny pot to plant. You can glue these on or use miniature wax to stick them to the table.

IMG_0882

Thought she needed some “friends” so I took a few seashells, and a little “transparent” Fimo clay to create a bunch of snails to live with her. I made a slimy body with antenna, pushed the shell into the back, and baked according to package directions.

IMG_0868

So many great ideas on pinterest, saw this cutie. Wire shepherds hook, with a teeny tiny birds nest made out of an acorn top. I got this, acorns, check, moss, check, teeny tiny eggs made with clay (baked with the snails) check….

IMG_0869

How ’bout some mushrooms? of course! Just out of the oven as well, baked escargot,  Mushrooms and eggs….Hubby thought I was talking about dinner. Imagine his surprise when he peeked in the oven!

IMG_0866

I put the mushrooms on toothpicks. that way I could poke them into the ground. I have several red & white glitter clay, and pink and white marbled. (In already planning a second outdoor home).

IMG_0884

Golf tee plus marble…equals gazing ball!  Mushroom, rocks and moss….

IMG_0885

IMG_0894

Final touch, lights!! set of 20 super tiny battery-powered lights! Magical!!! Pushed up from the bottom, batteries not included, but worth the last-minute revamp of her floor.

IMG_0892

You can find some fabulous miniatures online, and the craft stores and some garden centers are now carrying many super cute items for fairy gardens, but follow my motto: don’t buy what you can make! She has a friend waiting for an outdoor home. I have a leaky bird bath perfect for her future home. This is going to be a group craft with my friends, so well post as soon as we get them done!

Enjoy,

Debbie

Mr. & Mrs. Snowfrost

IMG_0795

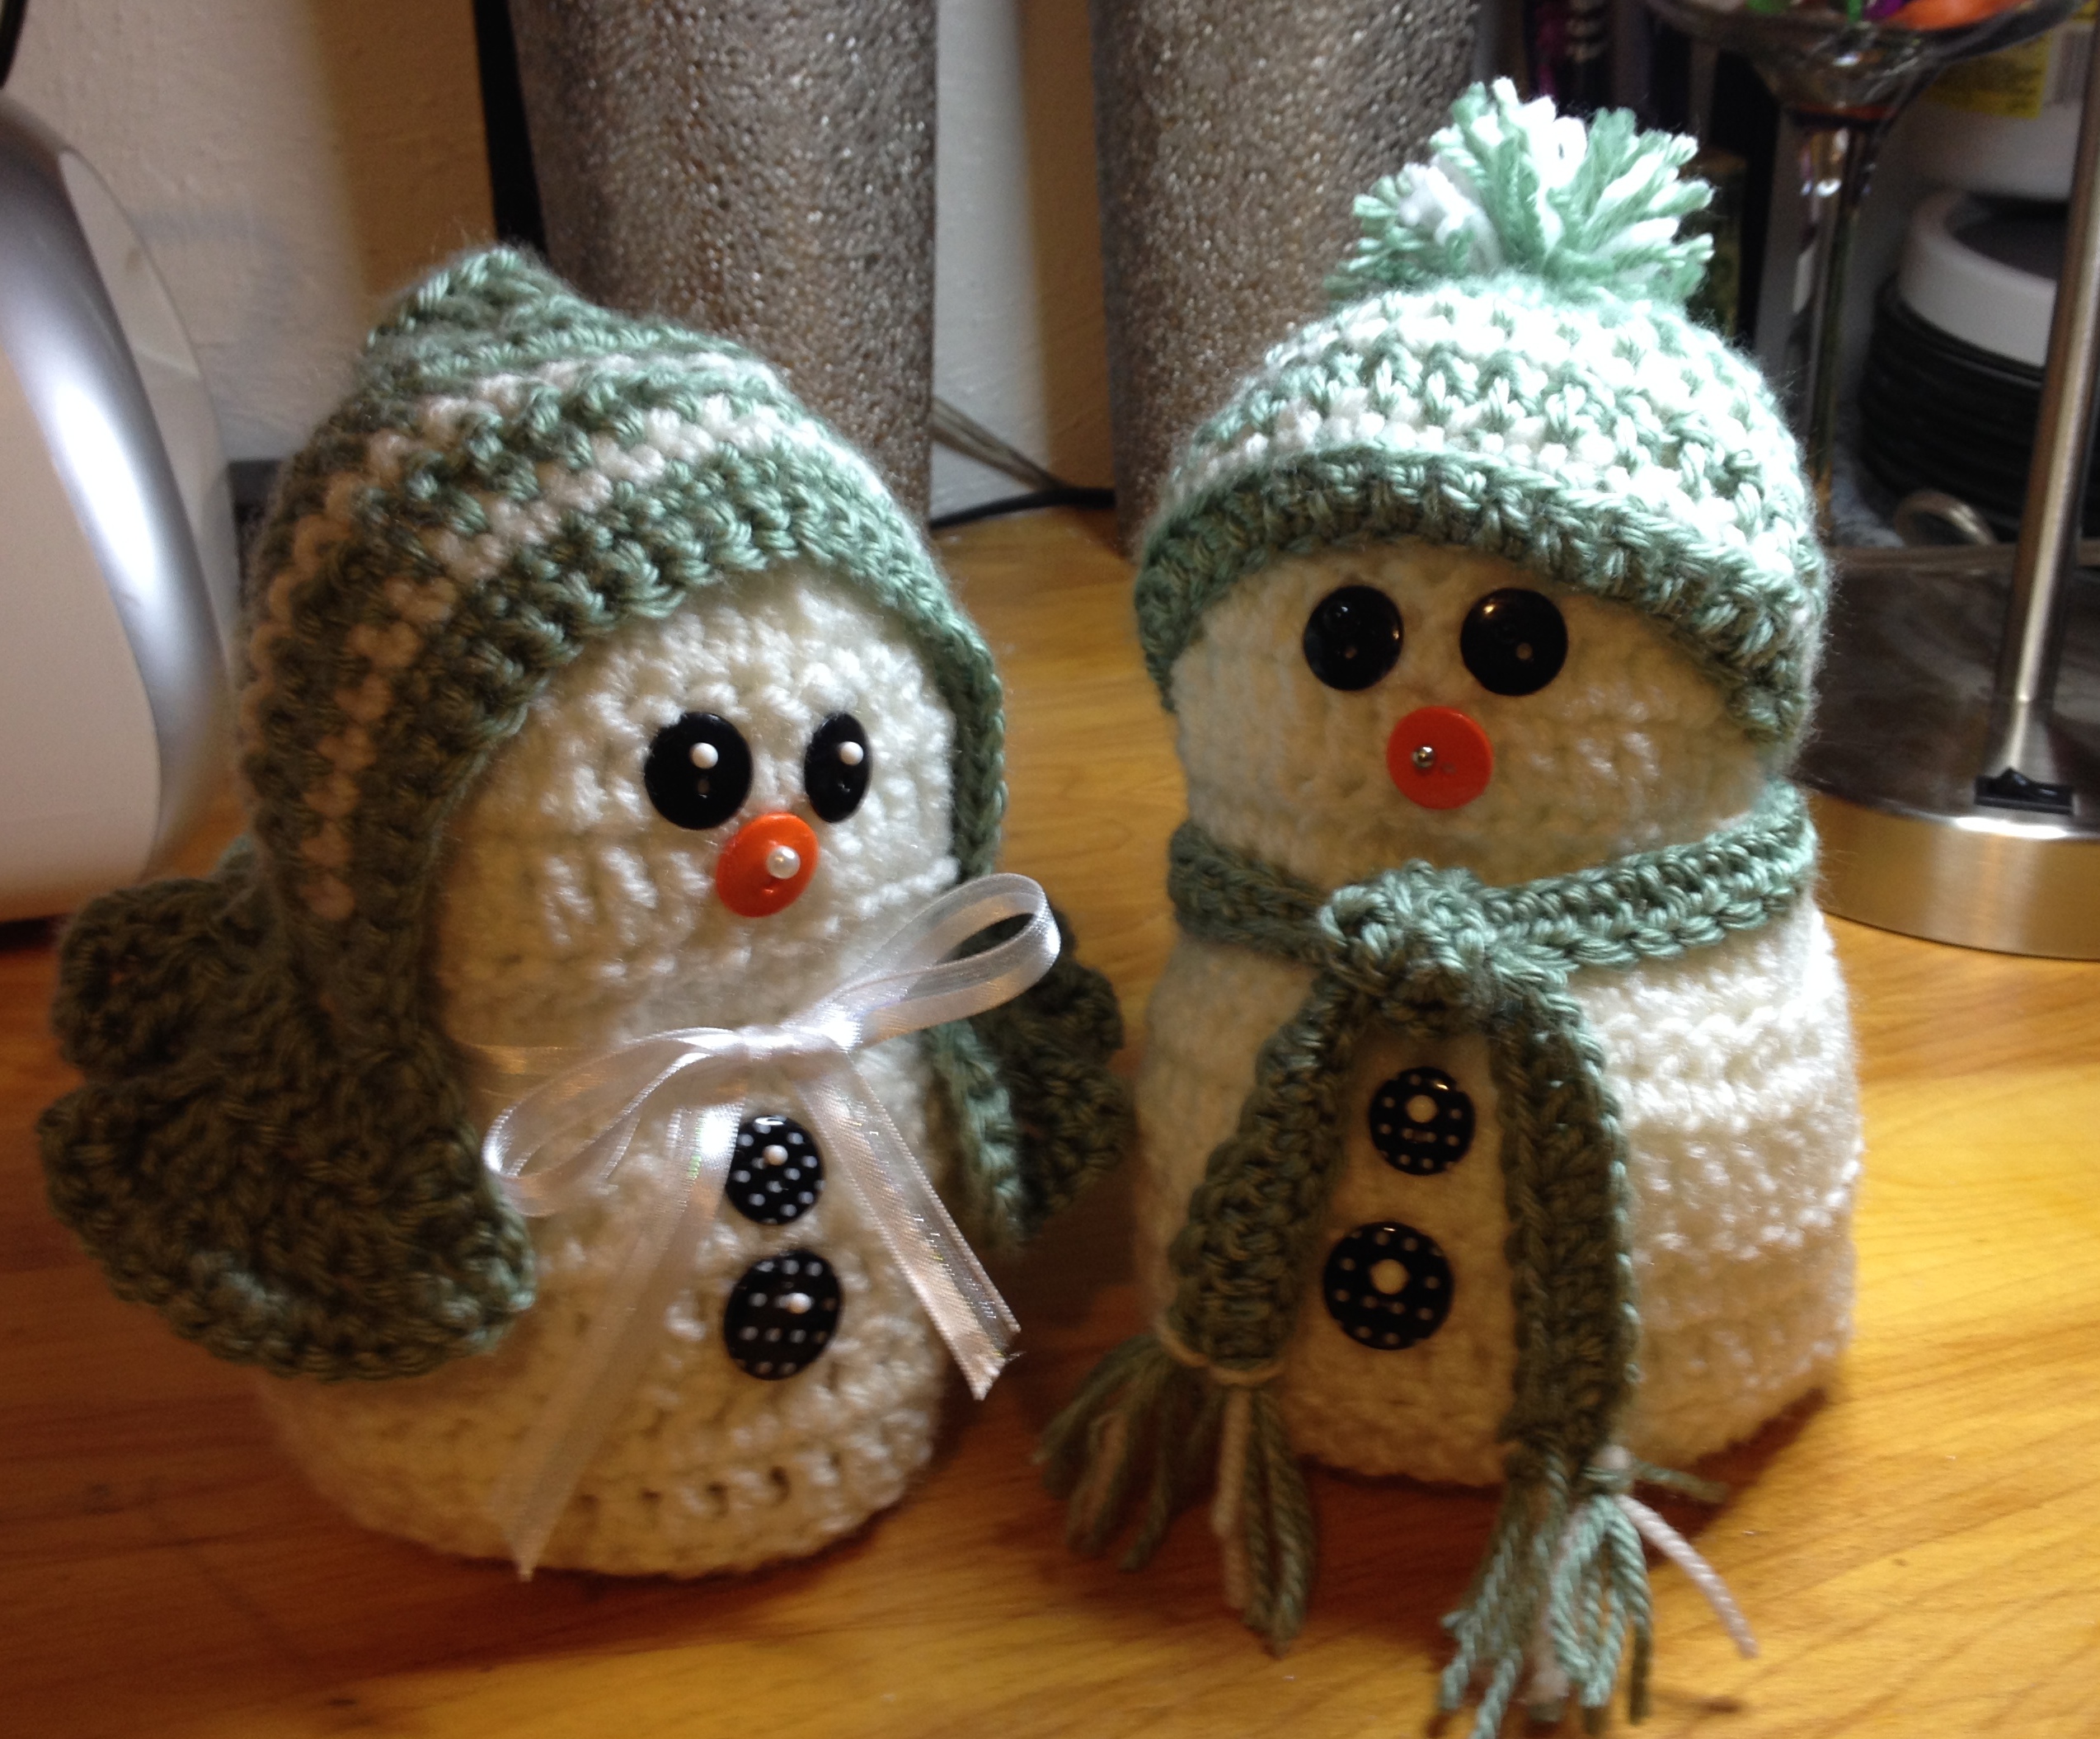
The problem with snow people, they melt! Leaving puddles all over your carpet, or you just can’t invite them in. Well, have I got a perfect couple for you, Meet Mr & Mrs. Snowfrost! Perfect house guests for the holidays, and they will only melt your heart!

I honestly don’t remember where this pattern came from, I have made several of them over the years, and do not even have the printed version anymore. I am posting from memory so that you can make your own pair of chubby, sweet snow people. Apologies in advance, if I forget a step. I am crocheting a set as I post in order to get it right.

IMG_0778

Supplies needed to make this charming couple:

1/2 skein of 4ply worsted weight yarn white

1/4 skein of green, red, blue or color of your choice for their clothes.

Crochet hook size G

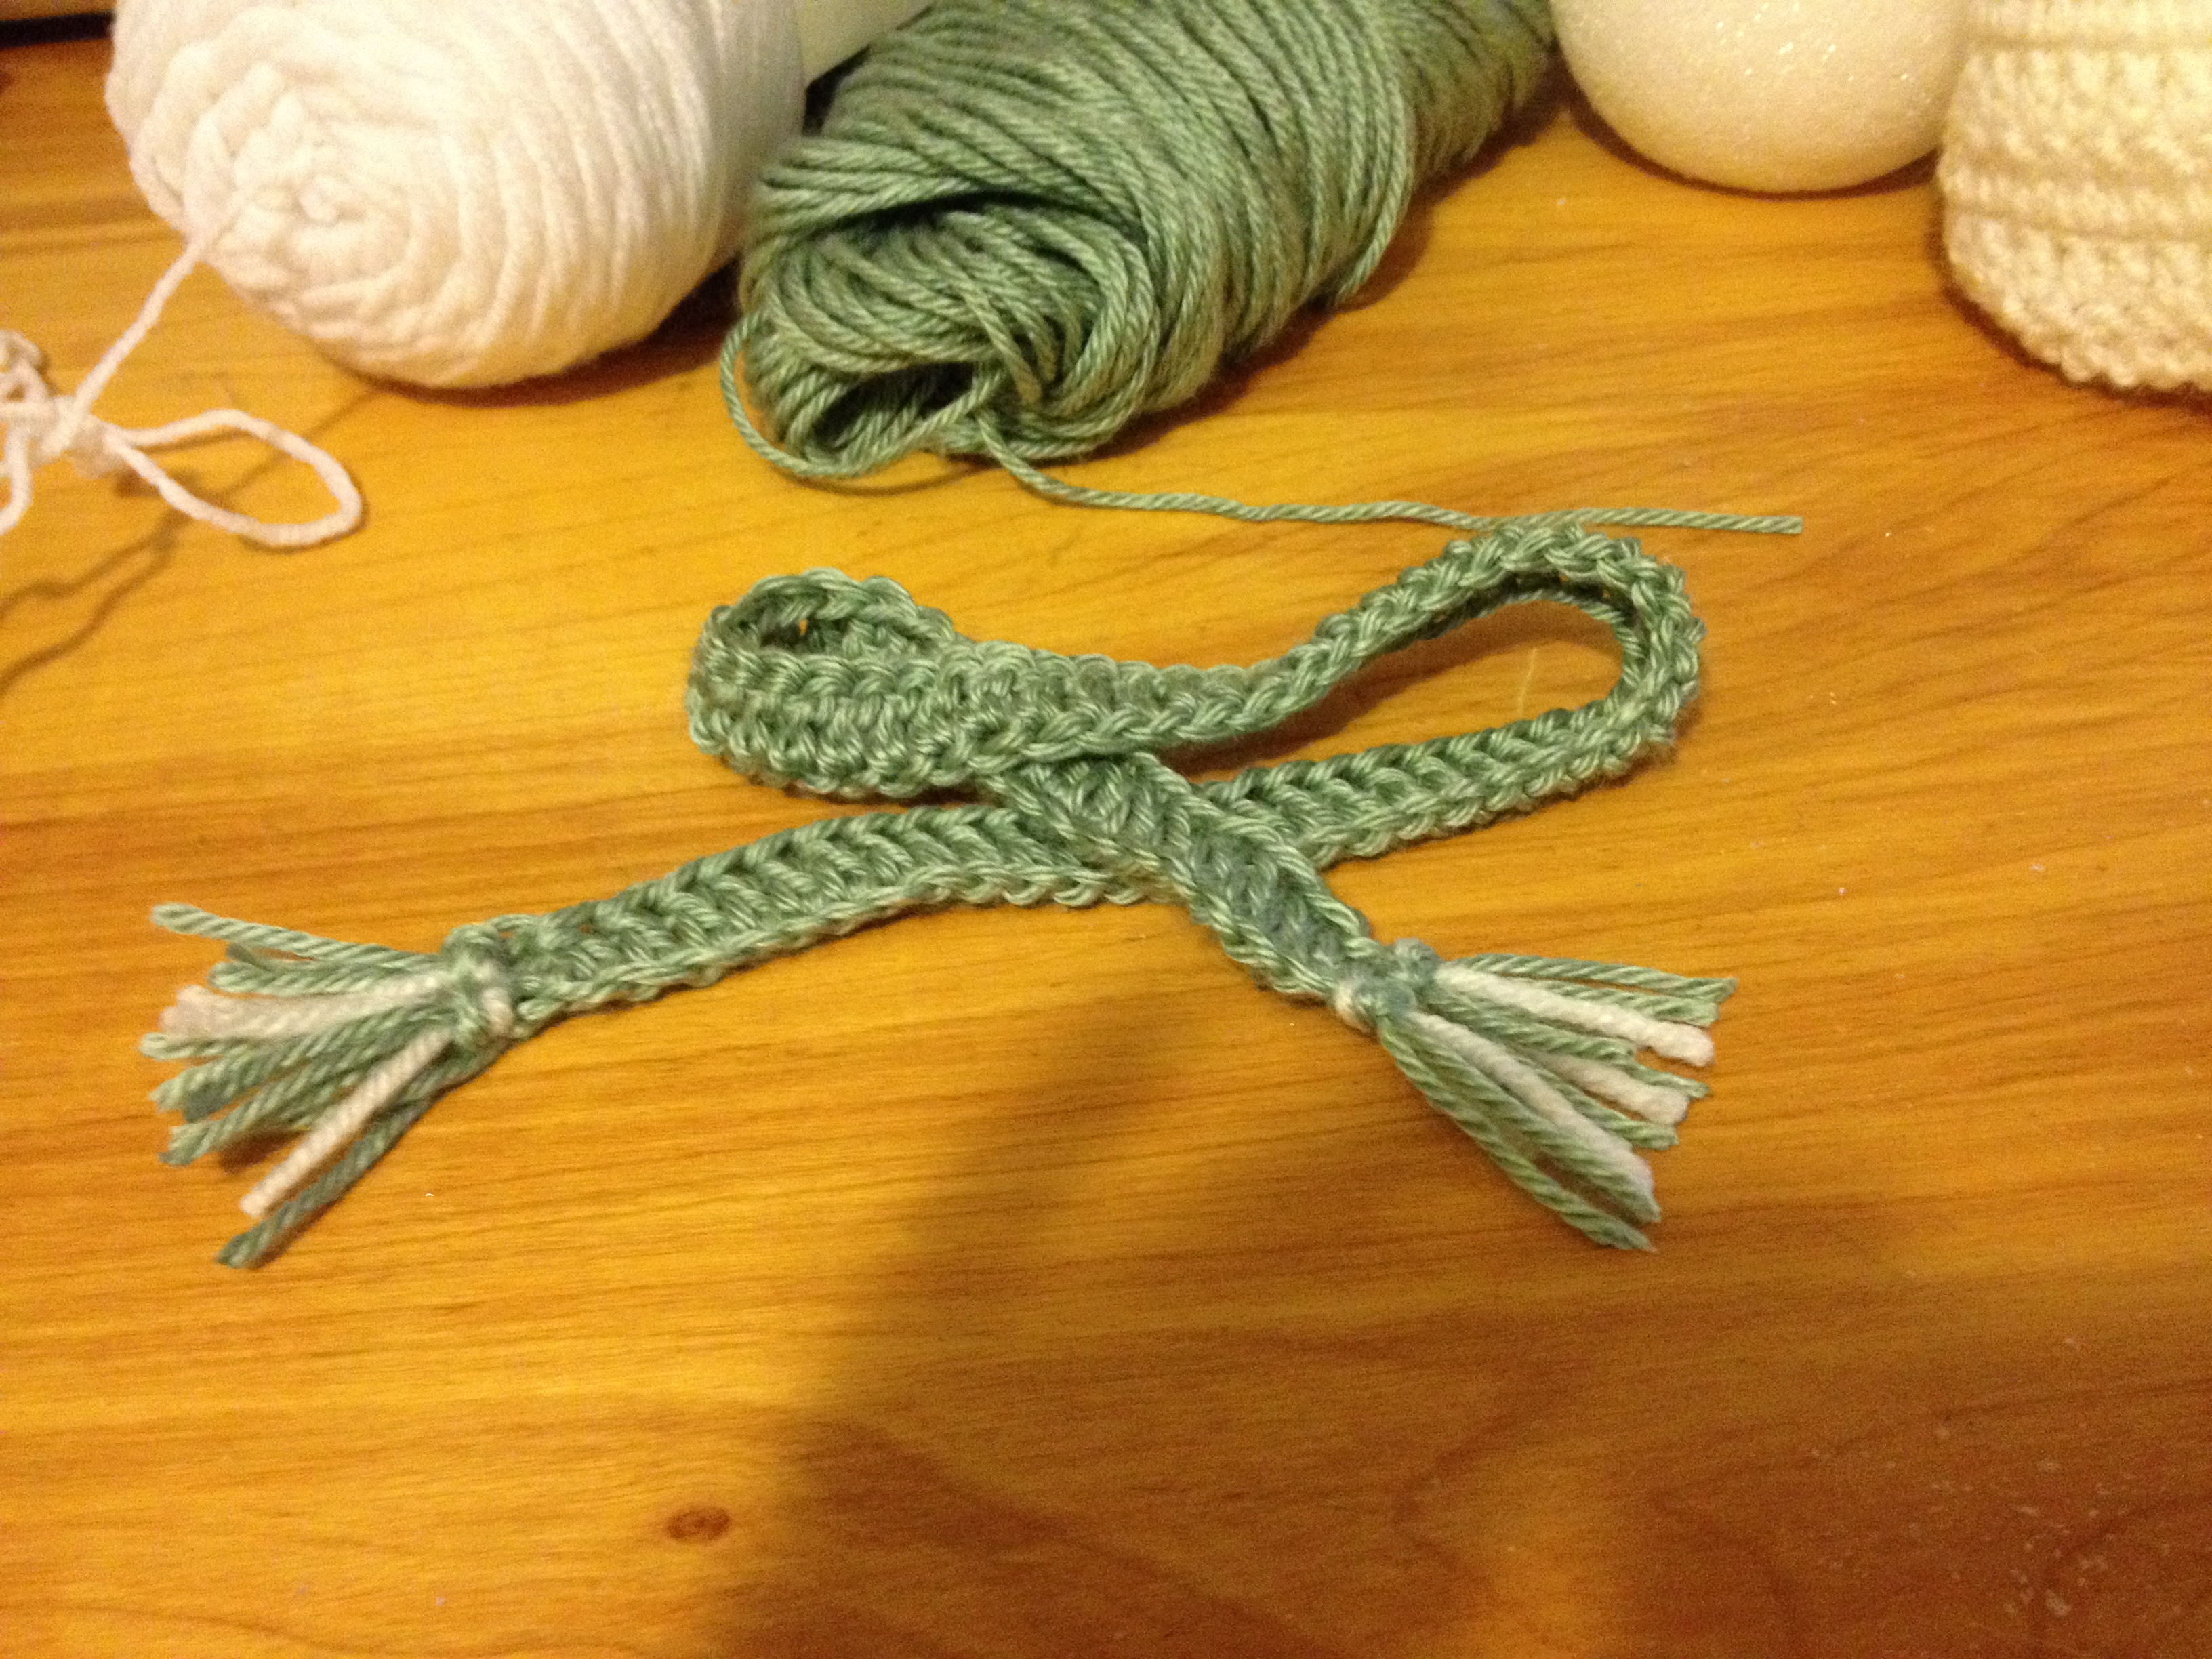
1/4″ ribbon to match or compliment (or you can make a yarn bow)

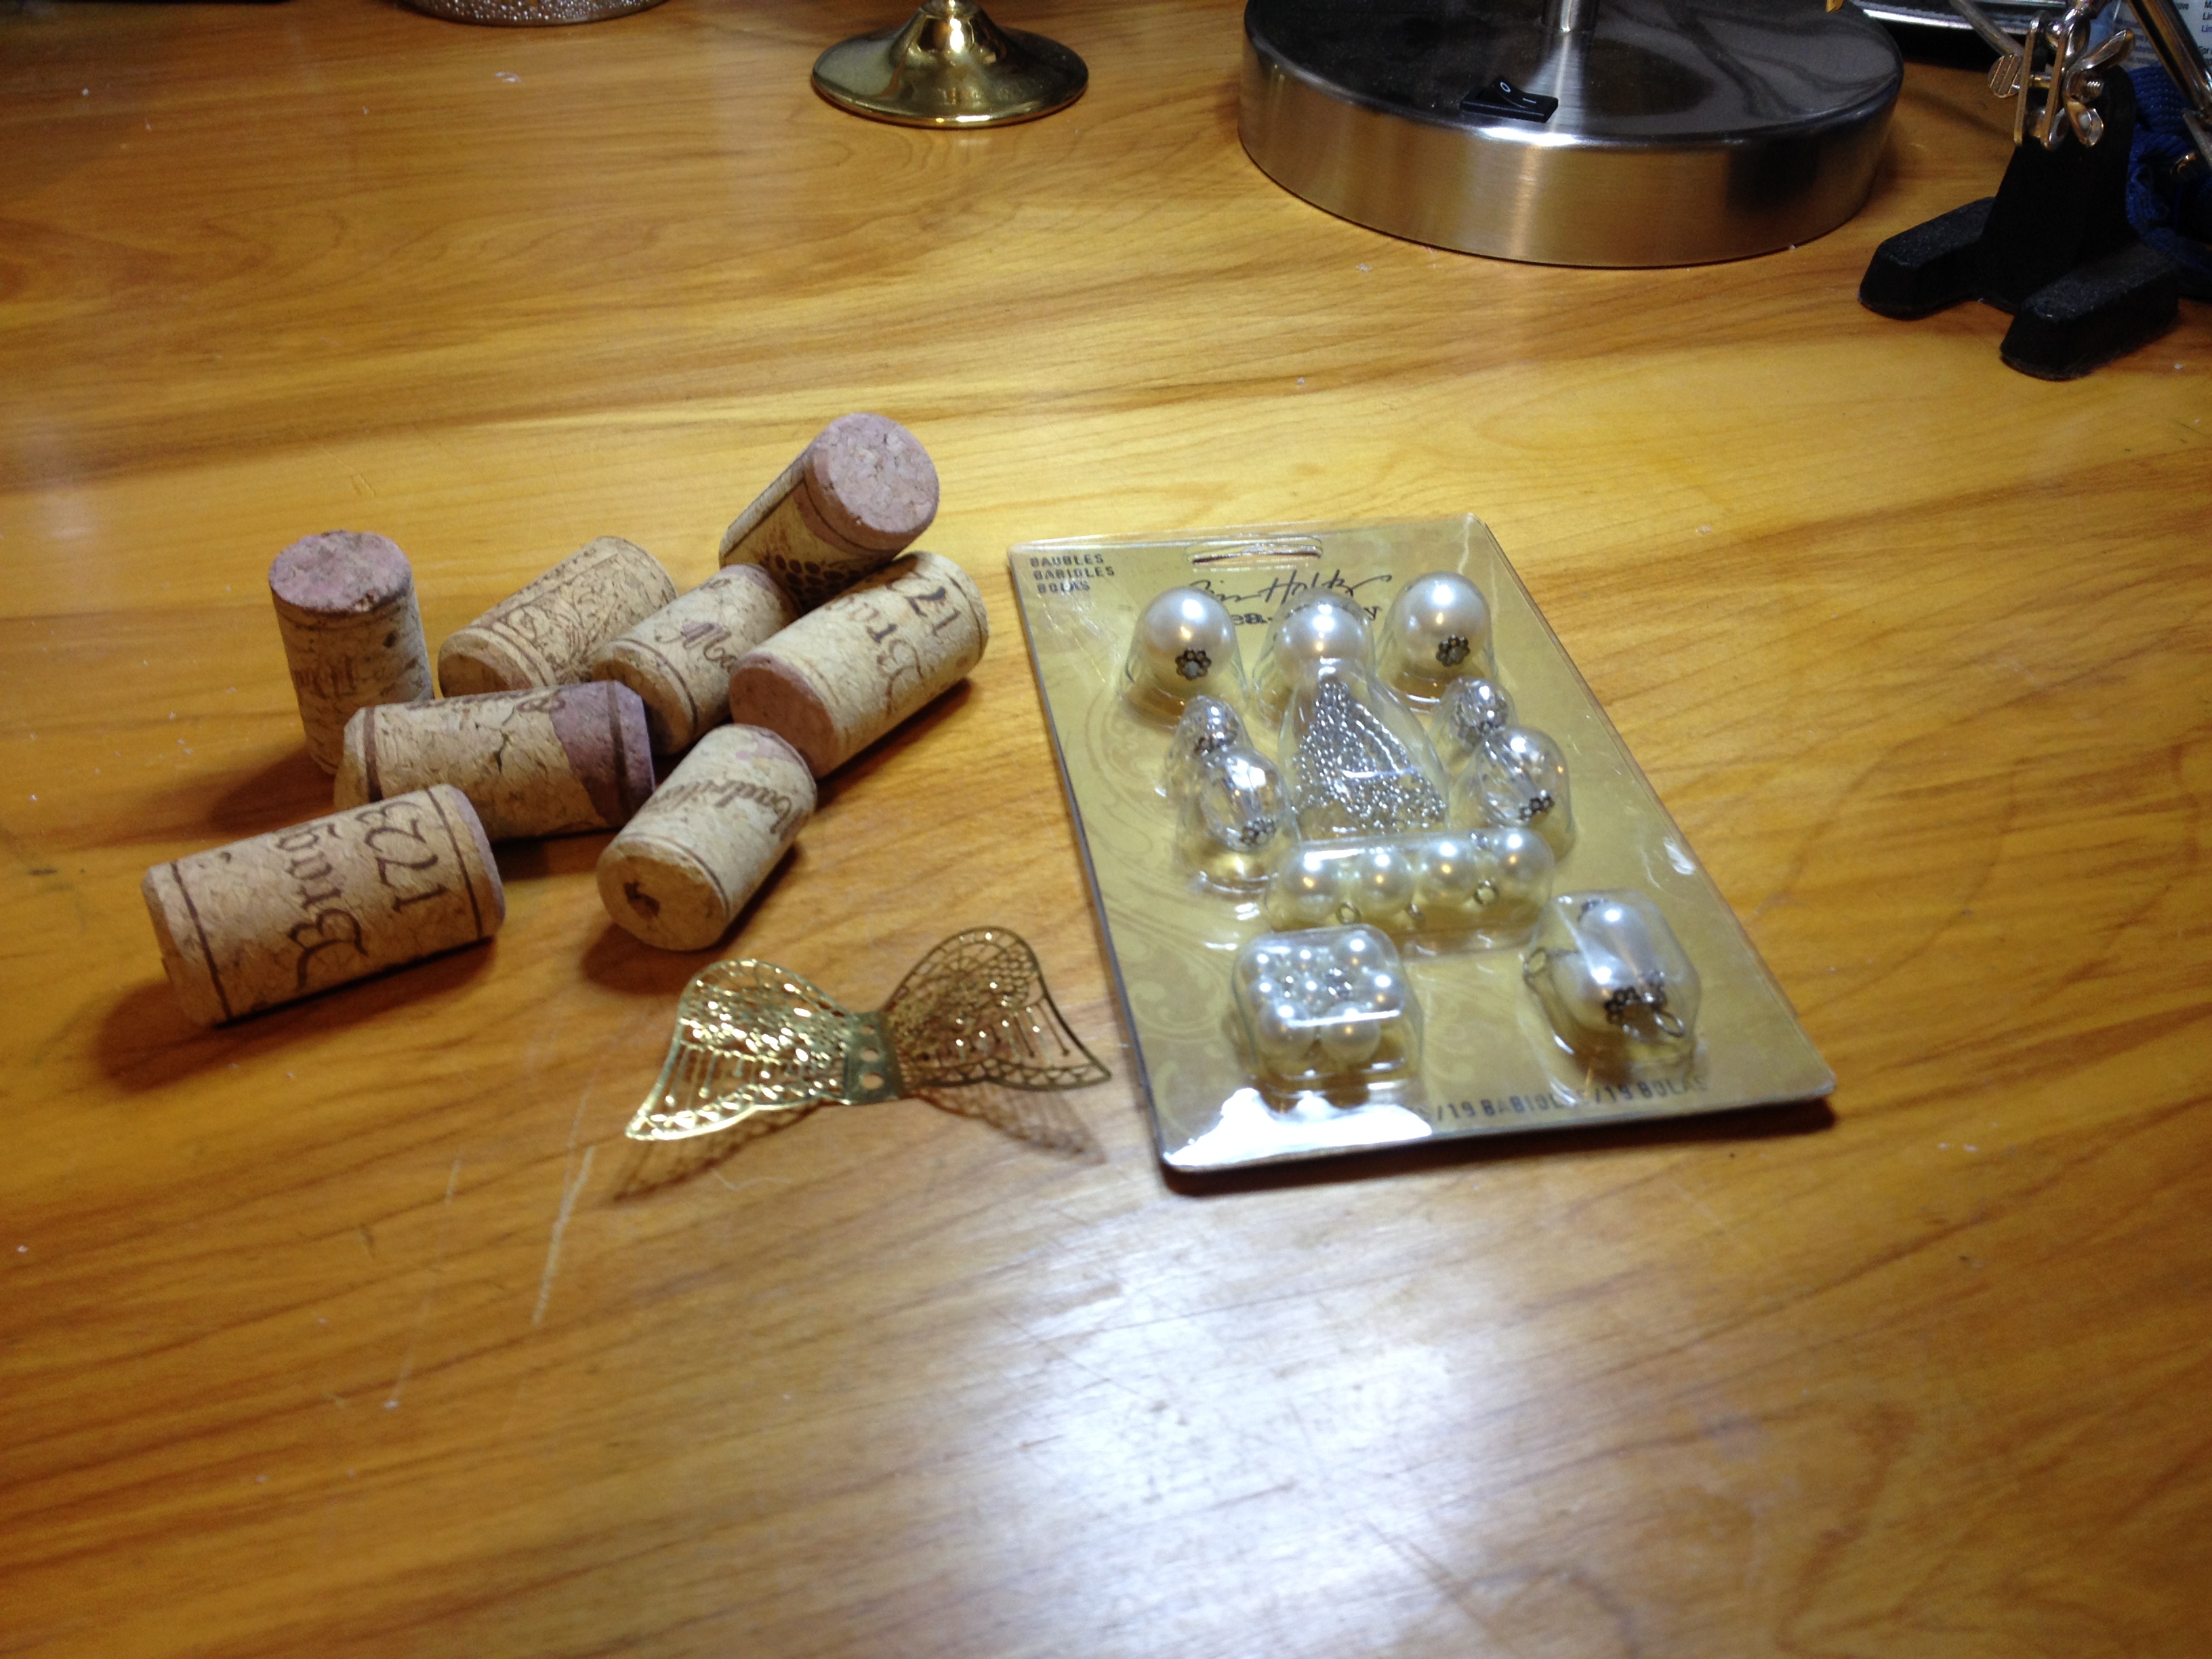
2-3″ styrofoam balls

2-4″ styrofoam balls

wooden skewer

buttons (I splurged a little and got the sparkly ones) Needle and thread

OR felt and white glue

I am currently in LOVE with the Caron Simply Soft “heather” yarns. They are so soft, and yummy to work with that I am reworking many of my projects again in this yarn. I had purchased this yarn to make a “watermelon” baby blanket for a good friend, and had the green and pink left over. So I decided to use it up by making more “friends” for my friends!

IMG_0791

Begin with the white yarn and make two bodies.

Row 1: Chain 41, turn skip 3 chains (counts as first dc) and dc in each chain across. (40 stitches) ch3 and turn.

Row 2: Dc across (40 stitches) ch3 turn again

Row 3-7: repeat row 2 (all dc across 40stitches)

Simple right? you just made the bottom of the snow people now time for a “tuck”

Row 8: Dc in first 5 stitches, decrease by Dc in two stitches as one, Dc in 5 more, decrease by one, Dc 5 more decrease by one, repeat until end (5 decreases = 35 stitches) ch3 and turn

Row 9-11: Dc across (s/b 35 stitches) ch3 and turn

Row 12: Dc in the next 4 stitches, decrease by Dc in two stitches as one, Dc 4, decrease by one, Dc 4, until the end cut off yarn, leaving an 8″ tail.

Pull the tail through the last stitch to fasten off, weave it around the top of Row 12 and pull together  gathering the top of head.  Using the tail sew the back seam, and knot to finish.

IMG_0781

Ladies First, Let’s make her a lovely cap and shawl:

Row 1: Using the green Ch 27, Sc in 2nd chain from the hook and in each chain across (26 stitches) *tip: I leave the yarn attached and carry it along since I detest changing colors and having lots of ends.

Row 2: Attach the white and Sc across carrying the green to the other side

Row 3: Pick up the green, chain 3, and Dc in each stitch across carrying the white back along the way.

Row 4: Bring up the white, chain1, Sc in each stitch across again, carrying the green to the other side. Fasten off the white.

Rows 5-7: Dc in each stitch across, Ch 3 turn

Row 8: Dc in next 9 stitches, decrease by one repeat 3 times, Dc in the next 10 Dc. Cut off the yarn leaving another 8″ tail and pull through last stitch to knot. Fold in half, and using the tail, sew back of hat closed.

Whew! you deserve a break, next the complicated part, attaching the Shawl to the cap.

Join the green to the left front corner of cap and sc across bottom of hat (26 stitches if I counted right) Ch3 and turn. *tip: the white stripes should be facing up and over from where you just joined the yarn.

Skip first sc, dc in the nest sc, ch 1 skip next sc, DC, chain 1, repeat across (this is the eyelets for the ribbon) Ch3 turn

Dc in each Dc and 2Dc in each chain space to the end, Ch3 turn

Dc in first dc, ch 1, Dc, ch1, (repeat across) turn and sc across bottom, up the side, across the front of the hat, down the other side and when you get back home….fasten off.

You can make a tie with matching yarn, just chain 50-60 stitches, leave some fringe and weave through the eyelets, I used 1/4″ satin ribbon.

IMG_0780

Now for the Mister,  a Hat and scarf:

Row 1: Ch 38 with the green yarn, join with a slip stitch to the first chain (be careful not to twist the chain) Ch3 Dc in each ch across, ch3 (37 stitches counting the Ch3) drop the yarn but do not cut off. *tip: since you’re working in the “round” you don’t have to carry the yarn, just leave it in front and pick it up when you get back.

Row 2: Join the white with a slip stitch and Sc in each Dc, join with a slip stitch, drop the yarn (don’t cut it yet) and pull green back up through the last stitch. Ch3

Row 3: Dc in each sc around, with the green yarn, join with slip stitch, pull up the white, Ch1,

Row 4: Sc with the white in each Dc, join with a slip stitch and fasten off. (now you can cut it) pull up the green yarn, Ch3

Row 5-6: Dc in each stitch around, join with a slip stitch, Ch3

Row 7: Dc next 2 stitches together as 1 around the hat (18 stitches) cut the yarn leaving 8″ tail, pull through to knot. Using the tail, weave around top of hat and pull tightly. (gathering it shut) and secure with a knot.

IMG_0788

Make a Pom Pom with the green and white yarn (about 2 fingers in width) and attach to the top of hat. You could also do a tassel, leave it plain, or whatever suits your fancy.

IMG_0784

To make the scarf, just Ch60, DC in the 3rd chain from the hook, and in each chain across. Fasten off. Cut and attach fringe to the ends of scarf.

IMG_0779

Putting them together is super simple, I cut off a small portion on both sides of the 4″ball, and one side of the 3″ ball to allow them to stand without wobbling, and to allow a flatter surface to glue the head to the body. I also inserted a wooden skewer between the head and body to stabilize them. I sorta like them leaning a bit, I think it gives them attitude! Slip the crocheted white body over the assembled styrofoam. “Dress” them in their outfits making sure the seam is in the back. I added some buttons for eyes and nose, and a couple down the front. You could use felt circles and glue them on. Maybe an orange nose?

IMG_0790

This lovely couple is almost ready for a night out on the town. Just sew, glue or attach the eyes, nose and buttons! The best kind of snow people, they don’t melt!

Enjoy,

Debbie

Sunflower Granny Square

IMG_0771I started this square about 30 years ago. My first-born was an infant, and I saw this pattern in a magazine. Well, needless to say, he and his little brother took over my life and I never completed the afghan. Soooo, fast forward to empty nest, and the long-lost squares. Since I couldn’t find the original magazine anywhere, I resorted to “uncrocheting” it in order to rediscover the pattern. It’s a good use of leftover yarns for the flower petal colors. I had several yellow and purple shades completed but since the dye lots are over 30yrs old, I’m going to finish it out with lots of different flowers colors.

Supplies needed:

Red Heart Super Saver yarn

White 3 skeins

Black 1 skein

Hunter Green 2 skeins

Flower petal colors: 3 skeins total of: dark Yellow, light yellow, dark purple, light purple, pink, burgundy, aqua…whatever colors make you smile!

Crochet hook size  I9  5.50mm

Scissors

*Remember flowers come in any color you can imagine, but there’s nothing like a sunny yellow sunflower that says “Spring”. 

There was a limited selection of yarns then, you can certainly use your favorite brand and colors. The gauge works best with a slightly stiff, medium weight, non-fuzzy type of yarn.

IMG_0772

Row 1: Begin with the black yarn, Ch 5 join to form a loop.

Row 2: Ch2 (counts as dc) 15 dc in the loop (16 stitches) join with a slip stitch in the Ch2. end the black.

Row 3: Join the flower color (yellow) ch2, work 2 dc in each stitch around (32 stitches) join with a slip stitch.

IMG_0774

Row 4: Working with the flower color, in the front loop only, (sc, hdc, dc) in the first stitch, (dc, hdc, sc) in the next stitch. This makes a petal in two stitches. continue around making these two stitch flower petals. (16 total) end flower color.

Row 5:  Join the hunter green in the back loop of the flower color round. (behind the petals) 2sc, ch3, skip 2 stitches, 2sc, ch3 skip 2 stitches, continue around join with a slip stitch.

Row 6: Chain 2 (counts as a dc) 3dc in the chain space (4 stitches) ch1, 4dc, ch3, (this makes the corner space) 4dc, ch1, 4dc,ch1, 4 dc ch3, 4dc (2nd corner) repeat around and join with a slip stitch end the green. *you should now have a fairly square shape around your flower.

IMG_0775

Row 7: Join the white, chain 3 (counts as dc) 3dc in the ch1 space.Ch1, 4dc, ch3 4dc (around the corners) ch1, 4dc, ch1, 4dc, c1, 4dc, c3, 4dc until you reach the beginning, join with a slip stitch,

Row 8: Ch1, single crochet in each stitch and 3sc in the ch3 corner around, join and end the white.

Viola! or violet whatever your color you used, you just finished a square. Mine measure almost 7″ X 7″, think I’ll make 28 squares so my finished afghan will be about 30″ X 50″ just about right for a nice comfy spring throw!

IMG_0777

Using white yarn, join the squares together. Take a couple of laps around the outside in single crochet to nicely finish the edges and as always….

Enjoy!

Debbie

Chardonnay Angel (Pinot, Moscato or Merlot)

IMG_0769

I have another confession, I really don’t drink much wine. The corks used here, were bought from the craft store. Yes, I’m more of a cocktail drinker, not a fine wine connoisseur. But you can certainly consume until your hearts desire, and collect your own personal supply of corks!

IMG_0745

Supplies needed for these “chardonnay” Angels:

Wine Corks (from the craft store or last night)

Angel Wings (I inherited these beautiful lacy ones from my Mom’s stash)

Beads, tassels, charms, eye pins, jump rings, sequin pins

pliers and wire cutters

IMG_0747

I started by attaching the wings to the back of the cork with sequin pins.

IMG_0750

Next I found a pretty head bead and used an eye hook and smaller seed bead (to keep it from sliding off) and pushed into the top center of the cork.

IMG_0753

Another eye pin with a tassel on the bottom, some pretty beads on the stem. Push this into the bottom of the cork (centered). You could do multiple strands of beads, chains, seed beads. Use your stash and be creative. I was looking for a vintage, copper and cork combo here.

IMG_0764

Thought she needed a little more sparkle on her cork, so I added seed beads with sequin pins around the edges (top and bottom) of the cork. I did have to take off her wings, should have done this step earlier. Live and Learn! That’s the beauty of doing it yourself. You can add/subtract, take it apart and put it all back together again until it looks the way you like.

So try not to overindulge in the vino, but be sure to save the corks!

Enjoy,

Debbie

The “Rock” Bird Retreat

IMG_0729

So I saw these darling little rustic birdhouses on Pinterest, and thought to myself: Self, you can do that. So I did, several of them, and more to come. I do have a handy hubby, and he could totally “rock out” some custom birdhouses for me to jazz up, but I opted for getting them done this year.

IMG_0723So I went to my “not so local” craft store and loaded up a cart of inspiration, and here they are.

Supplies needed for the “Rockhouse”

Unfinished birdhouses (I opted for the plain ones, more space to apply decorative items)

Small polished river stones (you can purchase a mesh bag, or collect your own)

Mastic (pre-made tile glue from the home improvement store)

Copper paint

small paintbrush

plastic knife and fork (for applying the mastic)

Clear Gloss Sealer

IMG_0727

That’s all for this basic one, but the possibilities are unlimited. I also purchased tiny seashells, seashell chips, sand and granite landscape rocks. You can also use “found” items like pennies, wine corks, pinecone pieces, moss, twigs, bottle caps, (I was even thinking of coffee beans for my favorite Barista). but for now lets keep it simple.

IMG_0726

These little pre made houses are so cute, you could just paint and be done but where’s the fun in that? I started by painting the roof metallic copper. I just used my craft paint stash. These are purely decorate at this point so you might want to keep them out of the weather if possible. On this one, I opted to paint the perch too. *tip: I should have painted the bottom ledge before I applied the rocks.  Now on to the fun part.

The mastic is pre-made and super easy to work with. I used a plastic knife to spread out 1/2″ layer to the side of the house. I took the fork and made “trowel” lines through the mastic. I figured since this stuff is water-resistant, its made for floor tile, it should hold these tiny rocks and hold up to some garden water. Working around each side, I applied the tiny stones in a random pattern until all of the surface was covered. I did pick out some longish ones to place around the birdie hole, in a starburst shape, and tried to keep too many matching ones touching (Yes, OCD again) but you gotta go with the flow! I’m a sucker for a gloss finish, so I decided to spray the entire thing with clear gloss sealer, plus I intend to put these in the  flower planter hubby hasn’t built yet.

IMG_0821

Just like potato chips, you can’t have just one….

left to right: the Rock, Beach Bungalow, Mossy Oak, the Mint, Chateau Chablis, the White House and City Lights.

Now accepting applications for new tenants they’re ready to go!


Enjoy!

Debbie

Holiday Sparkle Pinecone Ornament

IMG_0704

By far one of the most popular, favorite craft projects ever!! I first made one way, way back in the 1980’s. This idea came from one of my most treasured, inspirational, and loved person,  Aunt Joanie.  She shared this with me when we were visiting from out-of-town, and I came home with a bag full of supplies, and a really sore thumb from pushing in the pins.

Supplies needed for each pinecone:

20mm paillette (some stores call them sequins) usually stocked with the beads

1/2″ sequin pins

3″ egg-shaped styrofoam ball

Craft wire or ornament hooks

1/2″ ribbon

thimble or leather finger guard (if you wish)

scissors

wire cutters

IMG_0707

It has become harder to find the sequins, or paillette’s in the craft stores. It is much easier to locate them online. The actual count per ornament varies somewhere between 80-100. The paillettes have a tiny hole on the edge, the sequins have a larger hole. You can use either but be sure to put the hole out of sight.

IMG_0711

The start is the toughest part. Take the first 3 sequins (paillettes)  bend and overlap these into a cone shape, and secure to the pointy end of the styrofoam egg. Make sure the tip is closed, you don’t want to be able to see the styrofoam through a hole.  I used longer straight pins and a small bit of glue to secure them. Then, start pinning a row halfway below the start working around overlapping each sequin, pinning through both. Kinda like fish scales continuing around in the same direction.

IMG_0713

Work around, and around, dropping down as you go, covering the pins in the upper row, until you cover the egg. Your thumb may become numb. The more you do, the tougher your digit may become. I tried to use a thimble and a leather finger guard, but couldn’t feel the pins and got frustrated. My solution was more fingertip moistener (to grab them) and doing a pinecone a day until my thumb toughened up.

IMG_0717

As you come to the bottom of the egg shape, even out the drop but continue in the same direction until you cover the end of the egg. They will be flatter, but still need to stay overlapped and in the same degree of drop.

IMG_0715

Once you cover the bottom, put one final sequin over any pins still showing. Add a hanging hook or loop and tie with a ribbon. Hook or loop, your choice for hanging.

IMG_0718I actually hang mine without ribbon snugged up against the tree branches like a real pinecone would hang. The metallic and holographic finishes are so pretty, and they reflect the lights from the tree beautifully.

Here’s another one I made with “shell” or pearl finished paillettes.  I’ve also mixed the colors when I don’t have enough of one color and they looked pretty as well.

IMG_0709

So, from the “Real” Northern California, a sparkly pinecone that will dazzle when hanging on your Christmas Tree!

Enjoy,

Debbie

Amish Inspired Kitchen Angel

IMG_0698

I have a confession, I totally stole this little Angel from a lovely Amish crafter in Pennsylvania. Not so literally, I paid for one and brought it home. But, I dismantled her to figure out how to make them for my friends and family. Hope the Good Lord forgives me, but she was too cute not to duplicate and give away.  I made this one from Christmas towels and pot holders I found in the clearance section after the holidays.  Overall prints, solids, and border prints work best. For once, buying the cheaper towels and wash cloths works for the better. I tried the fluffier ones, but found them difficult to work with. My original still hangs in my kitchen, however she has allowed a couple of items to burn, I guess she’s reminding me to stay on the good side.

IMG_0684

Items you will need:

Kitchen towel (color or print to suit your taste or kitchen)

Pot holder (solid or matching print)

Dishcloth or washcloth in a color to compliment

1/4″ – 1/2″ ribbon

20 gauge wire

business cards (I laminated mine)

scissors

hole punch

wire cutters

IMG_0686

Start by fan folding your towel along the long side. I make each tuck about an inch across. This one was easy since it had a checkerboard print. Fold the towel in half pinching the pleats together.  *tip: I removed all the tags from the towel, potholder and washcloth because they just get in the way and seem to stick out in the worst places.

IMG_0688

Take a piece of wire, 6″ long and twist it around the towel approximately 3″ down from the top fold. (this becomes her head).  Leave the ends of the wire long so you can attach the arms and wings.

IMG_0691

Roll the washcloth tightly into a tube,  and wrap it around the towel, with the ends inside. Using the ends of the wire you just placed, secure the “arms” to the back of towel. Bring them around to the front, and take a separate piece of 4″ wire and secure her “wrists” together near the ends.

IMG_0692

Next take the pot holder and “scrunch” it to form the wings. This takes a little muscle in your fingers to hold it while placing 4″ piece of wire to hold it’s shape.  *tip: place your thumb in the hanging loop of the pot holder and pinch the middle of the bottom upwards until you have several small folds. Place the wire through the hanging loop, and tie on the front of the wings. You can adjust the folds after tightening the wire, so they’re evenly spaced. Attach the wings, using the wire holding the arms and body, and the piece you just tied. Make sure you put the hanging loop of the pot holder at the top so you can hang her up! Be sure to put the “pretty” side facing forward, since the back is not seen. All the wires should be inside the back between the wings and body. Tighten and clip off any excess ends.

IMG_0694

I printed the verse on business cards, laminated them with self sealing pouches since they were going to be in the kitchen, and I was concerned the paper would get wet or dirty. I kept the verse the same as the original, but you are certainly at liberty to edit to your style. I used the hole punch to get a nice clean hanging hole, and threaded a 1/4′ ribbon through.

An Angel in the Kitchen

Watching the Stew

Blesses your Cooking

And All That You Do

IMG_0695

Finishing touches, I tied ribbons around her neck to hide the wire. I used two ribbons 1/4″ and 1/2″, two different colors, tied into a bow. Attached the card with a single 1/4″ ribbon around her wrist.

I hope you enjoy making and sharing these little angels. The original travelled across the country to find a California home, and inspired many copies.

Enjoy,

Debbie

Angel for your Office

IMG_0680

I know we’ve all had a bad day at work, so here’s a little quickie to ward off those bad days. I made these a few years ago, for my co-workers and to sell at a local craft fair. Next thing you know, I started getting bulk orders for custom colors and quantities.  Once you get the hang of it, they go together quickly.

I found the ideal clamps in two sizes, large and regular as well as two finishes, silver and gold, at the Office Supply store.  Then took one of each size to the craft store to figure out what size head bead would look proportionate. Measurement for the large size is listed first, the smaller size ones (in parenthesis)

IMG_0673

For each Angel you will need:

Ideal Clamps Large (regular) body of Angel

12mm Pearl bead (8mm) head of Angel

10mm Jump ring (6mm) for the halo

1/4″ ribbon, various colors

Small silk flowers

hot glue gun or quick dry glue

scissors

Charms, miniature tokens, embellishments

I purchased both pearl beads and wooden beads for the heads. It seemed to me that the pearl and silver ones looked “city”,  and the wooden heads more “country”.  Make sure the jump rings are a size smaller than the head bead, you wouldn’t want her halo falling off, or slipping down.

IMG_0674

I started by cutting several lengths of ribbon into 12″ pieces.  Next, separating the flowers and leafs from the stems. I set up bowls of each item and worked on these assembly line style. Start by threading a head bead onto the ribbon.  Leave a hanging loop 1-1/2″ long, and go back through the bead again. Tie the ribbon around the middle of the clamp and cut ends on a diagonal. Slip the jump ring for the halo, over the hanging loop.  A little dab of glue will hold it, but I kinda like it to move around a little bit.

IMG_0678

Now all that’s left is to embellish her “dress”. I put a leaf as a base, then add some tiny flowers. You can add them with the hot glue gun, or quick drying glue. If I’m feeling extra fancy, I add a charm. You can do them in pinks and blues, they were quite popular for baby’s first Christmas Ornaments. Sports team colors, School colors, holiday flowers and my favorite purple and white!! Be sure to embellish both sides of the dress, she’ll spin when hanging.

IMG_0682

I hope these bring you joy, and end all those pesky bad days at work. A quick and easy craft, that is pretty and thoughtful.

Enjoy,

Debbie